On May 17th 2024, Aslı, Michelle and Karmijn worked on combining the tool holders and code crafted to far in a full day of experimenting. Lots of happy accidents and reflection on the process, hacking machines and the links with dotworking and blockprinting in our pilot. We’ve highlighted some interesting observations that may be helpful for our hybrid vocabulary surrounding craft and our pilot.
Parameters
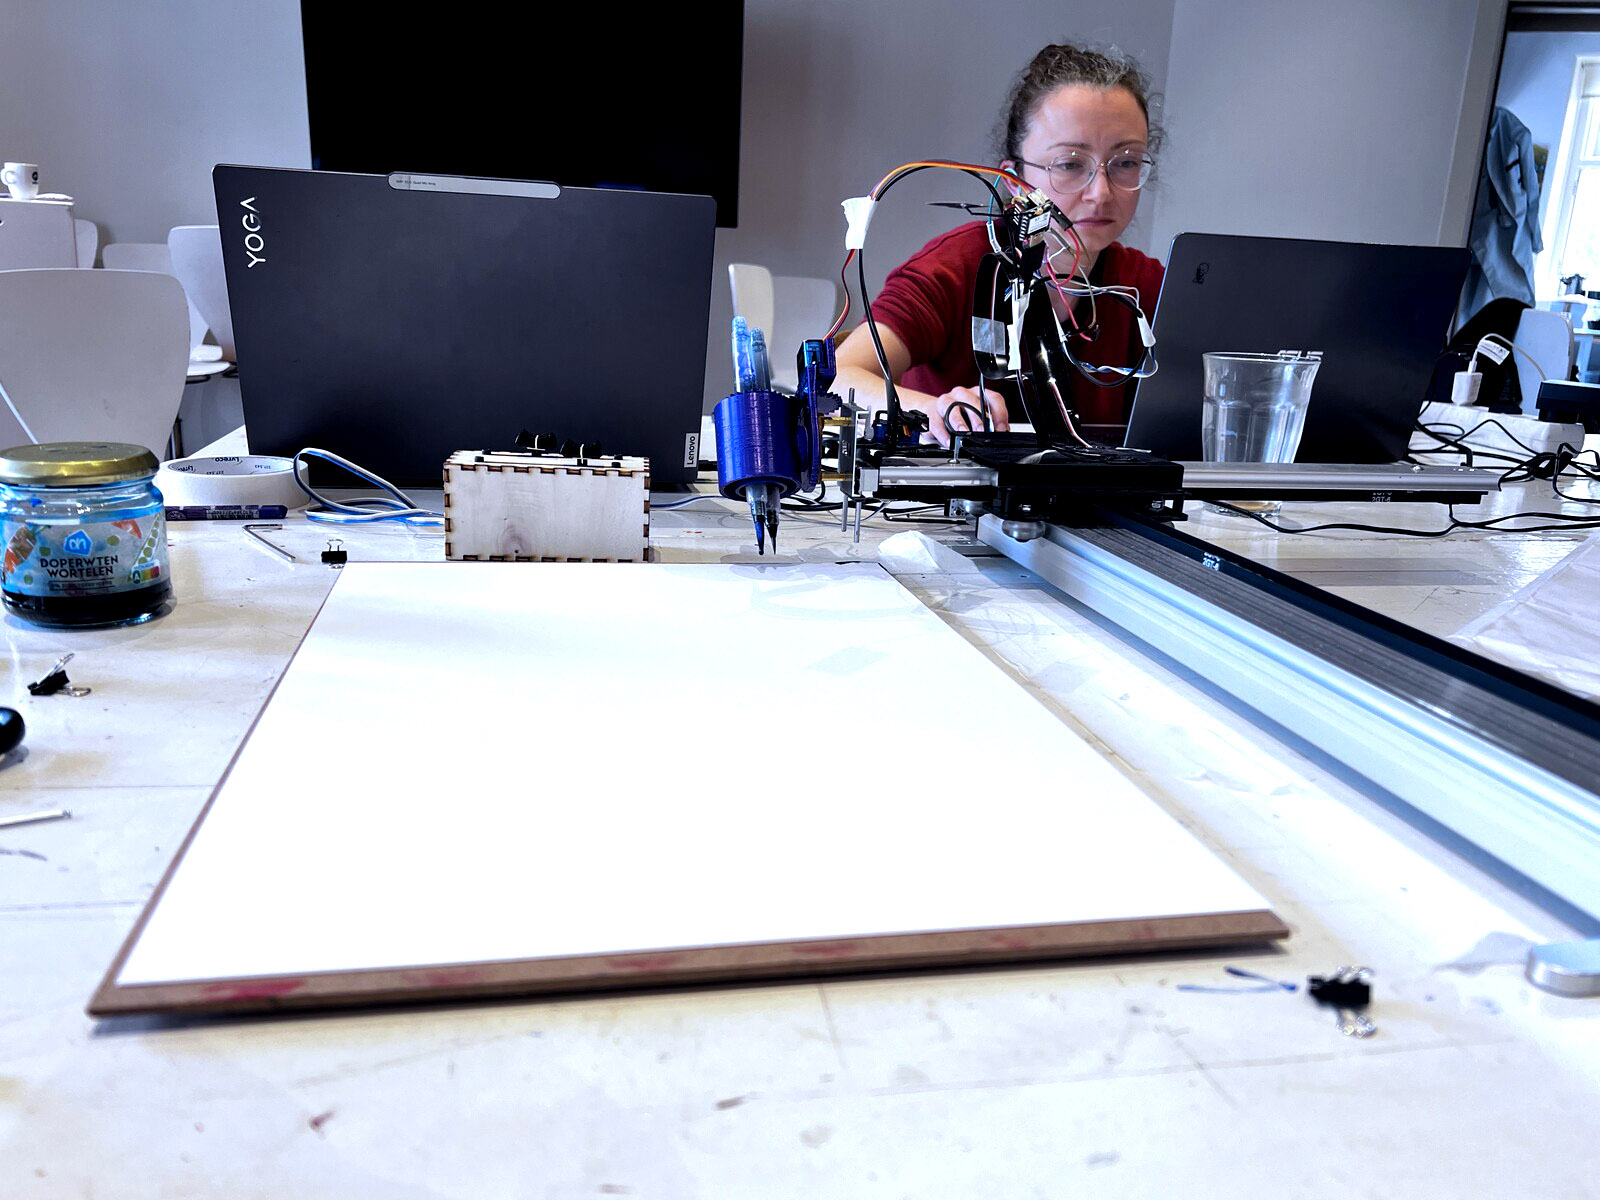
Our parameters are the hands, the medium, the tool, the tool holder, the surface, the machine and the code. They are all intertwined and cannot do without each other.
- Hands: human-human-machine collaboration: researching a collaborative craft between the plotting machine, the person controlling the machine and the person controlling the plotting process
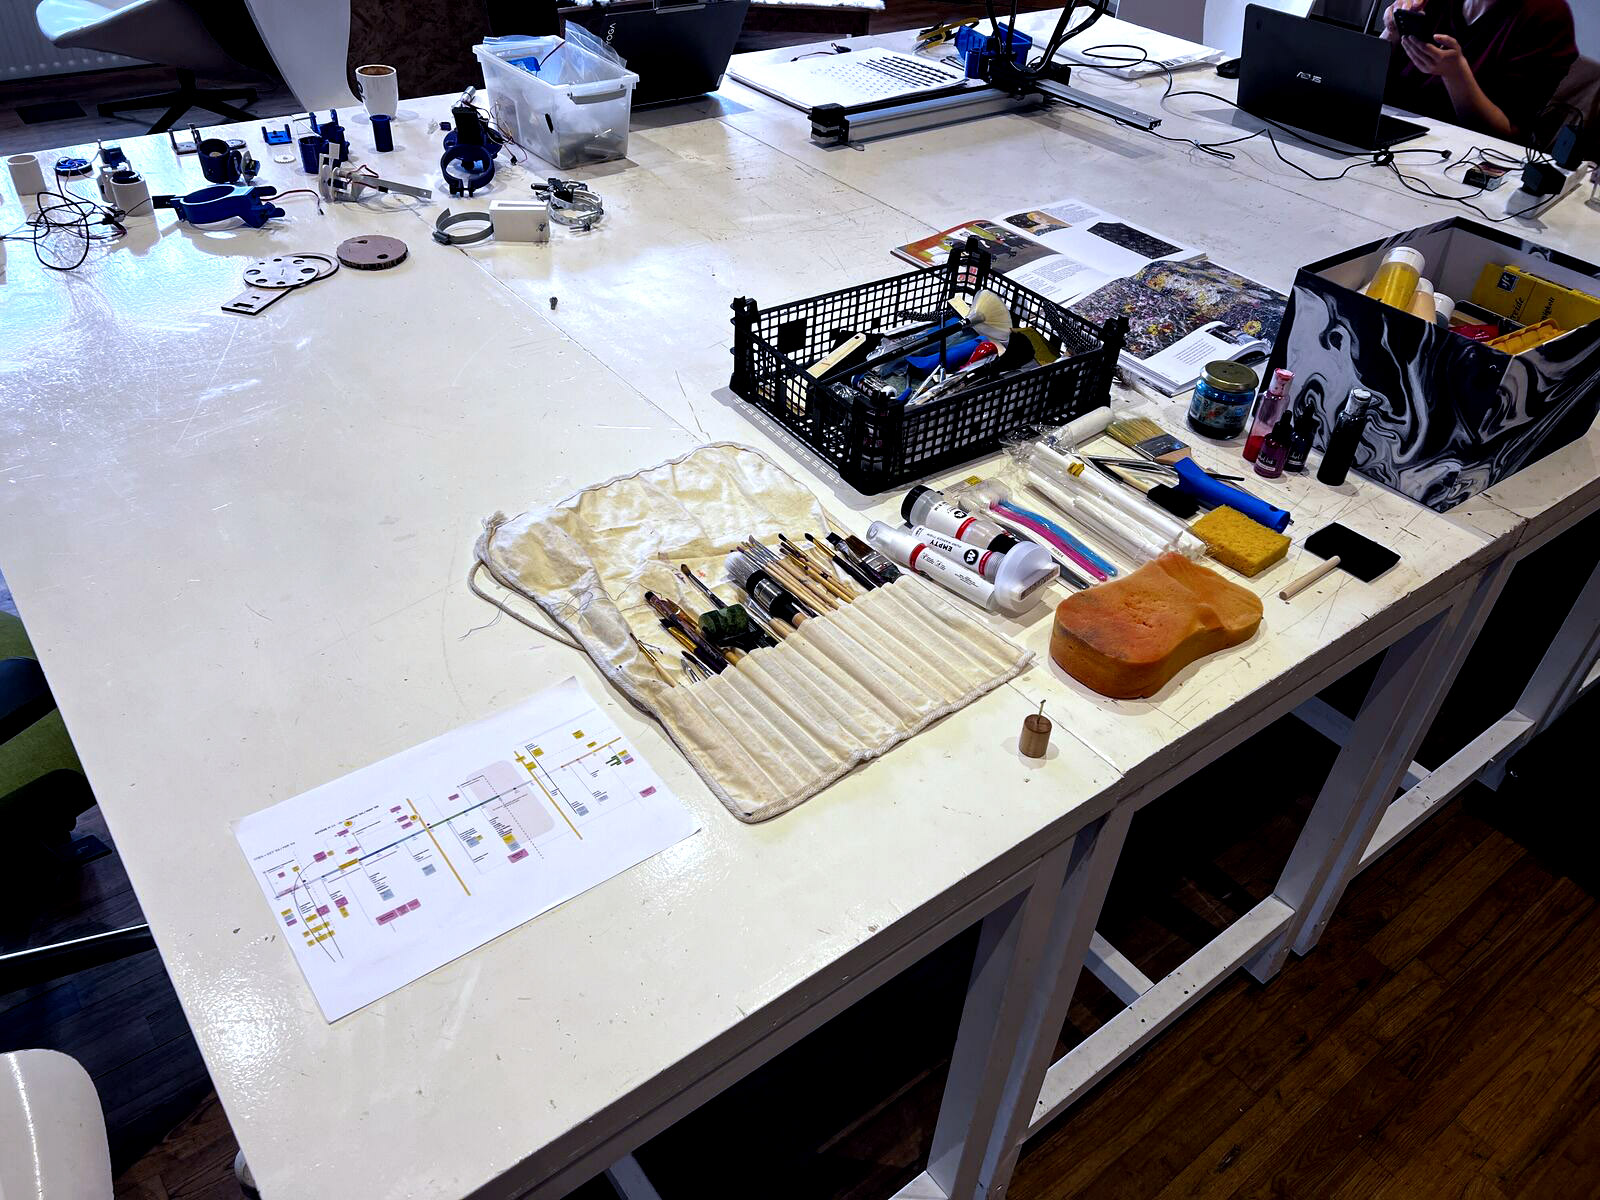
- Mediums & tools: we used existing mediums and tools: brushes, stamps, inks and paints that we bought
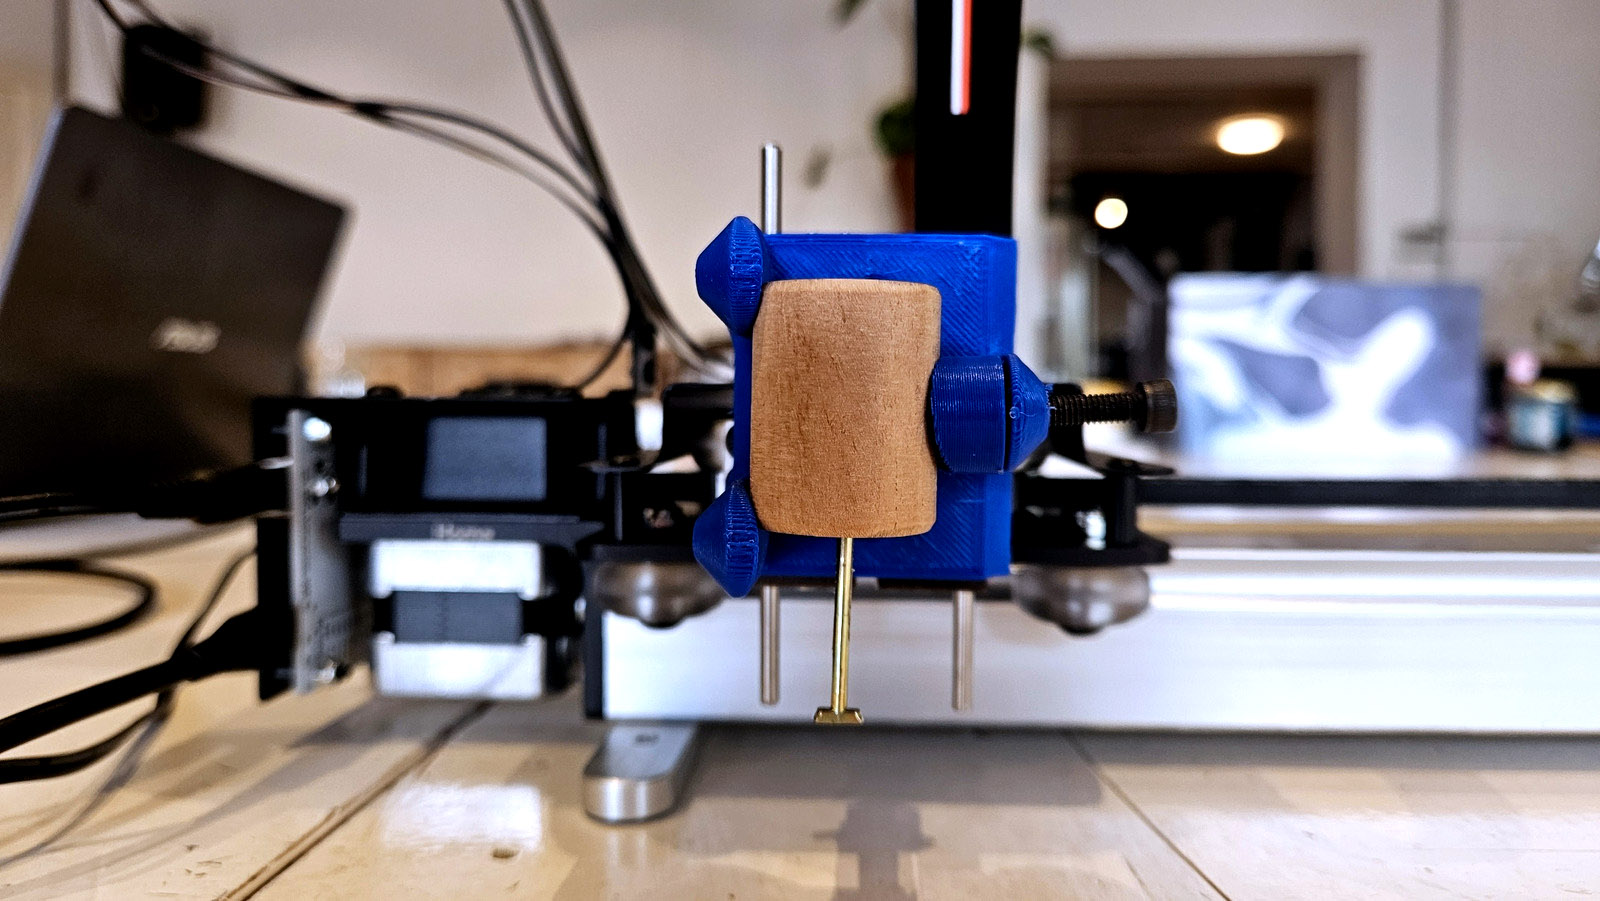
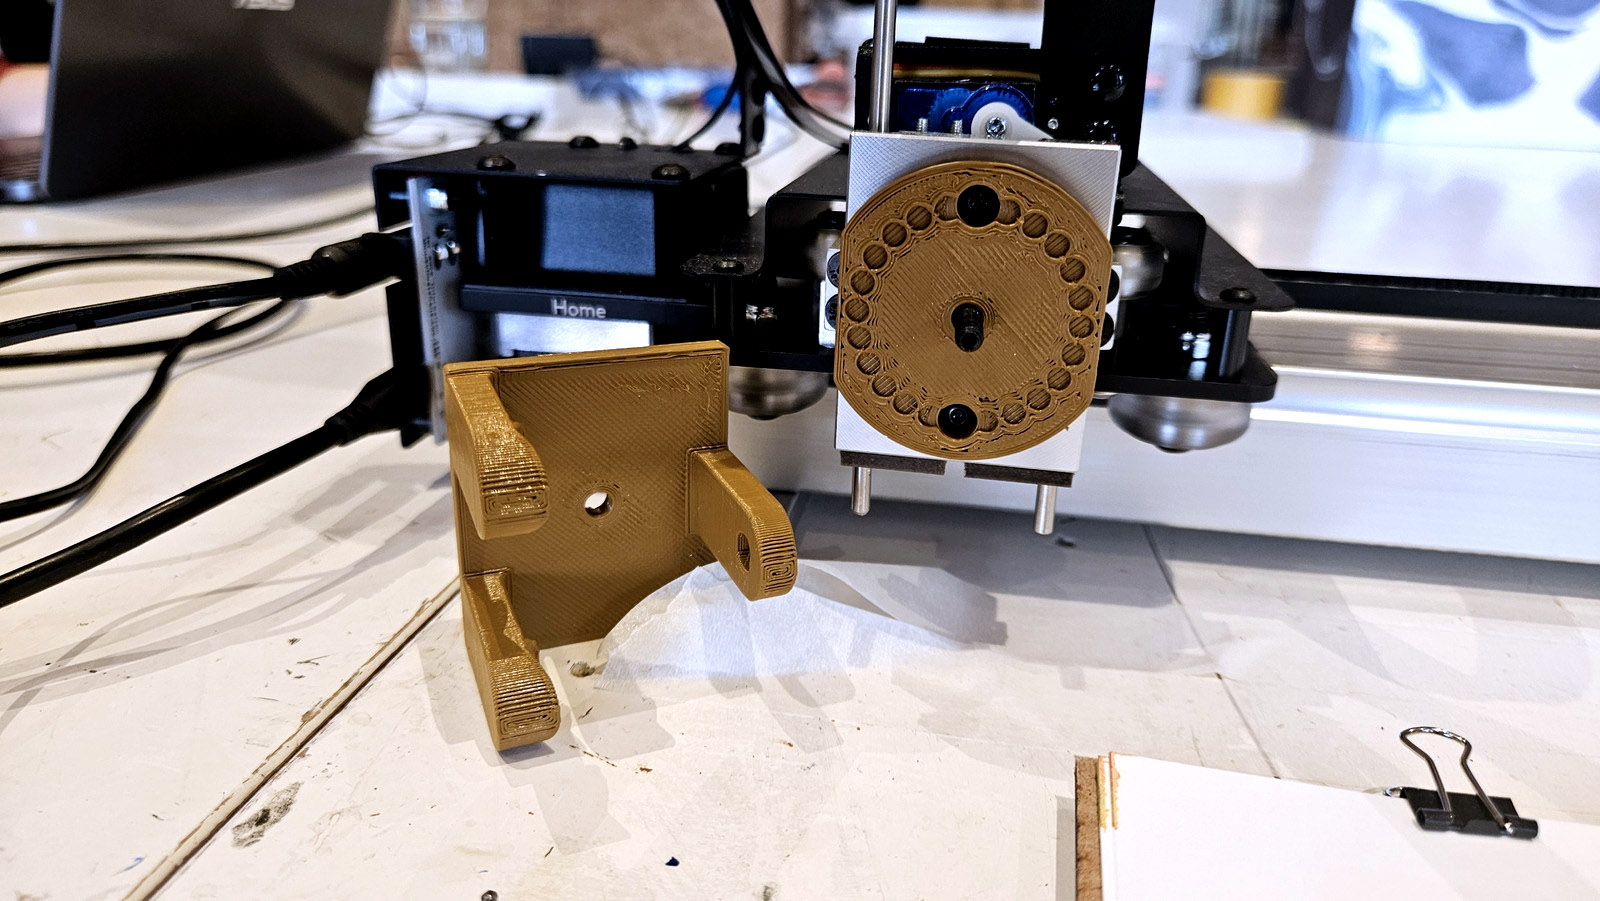
- Tool holders: we tried out all of the tool holder iterations created beforehand, except for the last tool holder (the swinging and revolving tool holder) because we ran out of time
- Surfaces: we mostly use white paper, because at this point in our research we are not looking at the definitive mediums (which will be bio-based) yet. Our focus it the shape of the motion and the interaction between humans and the machine.
- Tool and machine motion: the focus is on composite brush and stamping motion
- Grids & code: the grids are based on grids used in Staphorster dotwork. The focus is now on all-over prints instead of prints that are heavily influenced by their placement and context. Within dotwork and blockprinting placed prints are very common.
The focus is testing the various hardware iterations (the tool holders) in combination with software iterations (different grids), glued together by the embodied experience of working with our hacked machine for the first time.
We tried out the tool holders chronologically:
- Static
- Rotating
- Revolving
- Swinging & revolving (we didn’t have time for this one yet)
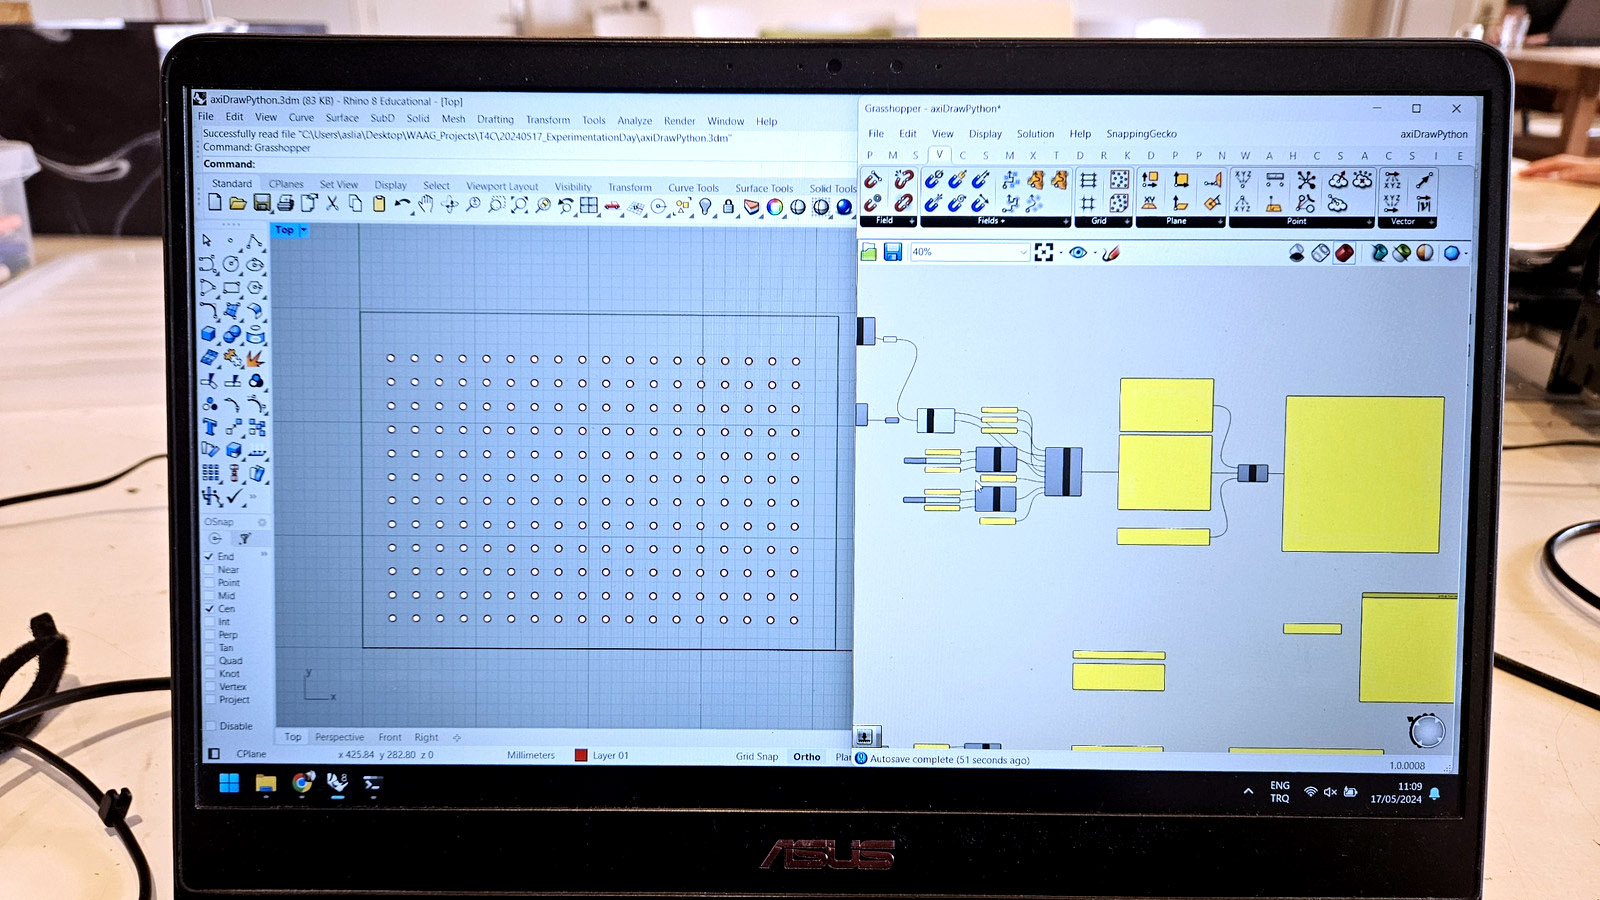
The documentation is organized per file used. You will first see the created Grasshopper file, then the generated grid, followed by the various experiments using these grids and notes on our experiences.
The challenge in the back of our minds today is:
How can we maintain the performative action: the serendipity within the craftsmanship process, the element of chance and the sensorial element of both the craftsperson and the material when working with digital solutions that tend to be more sterile and optimised for faster, cheaper, replicable large quantities of products?
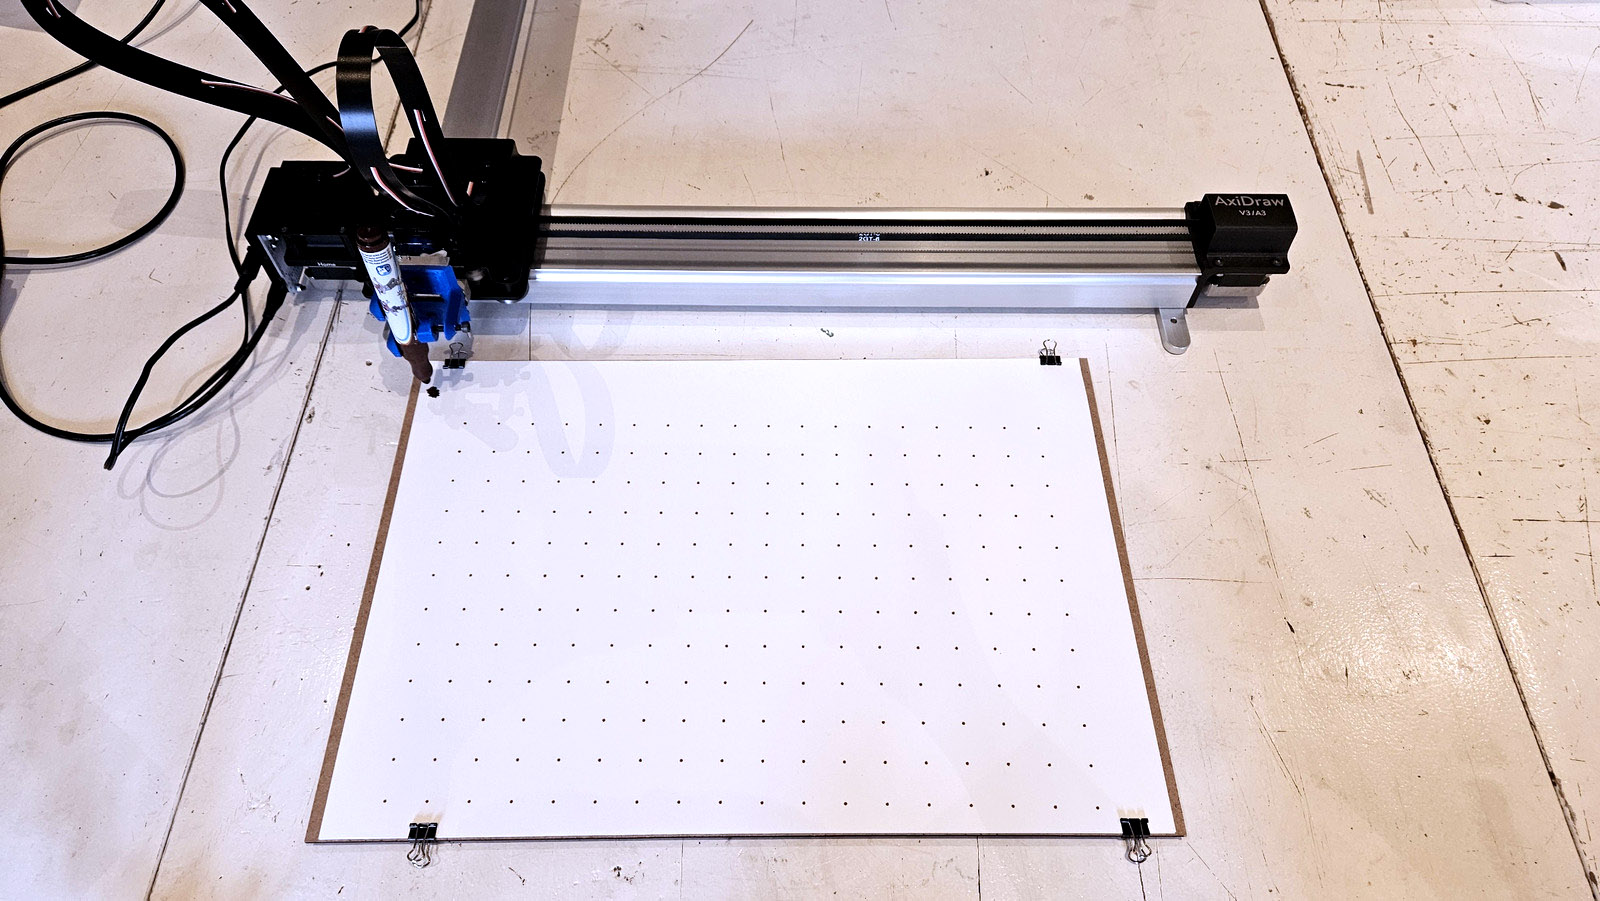
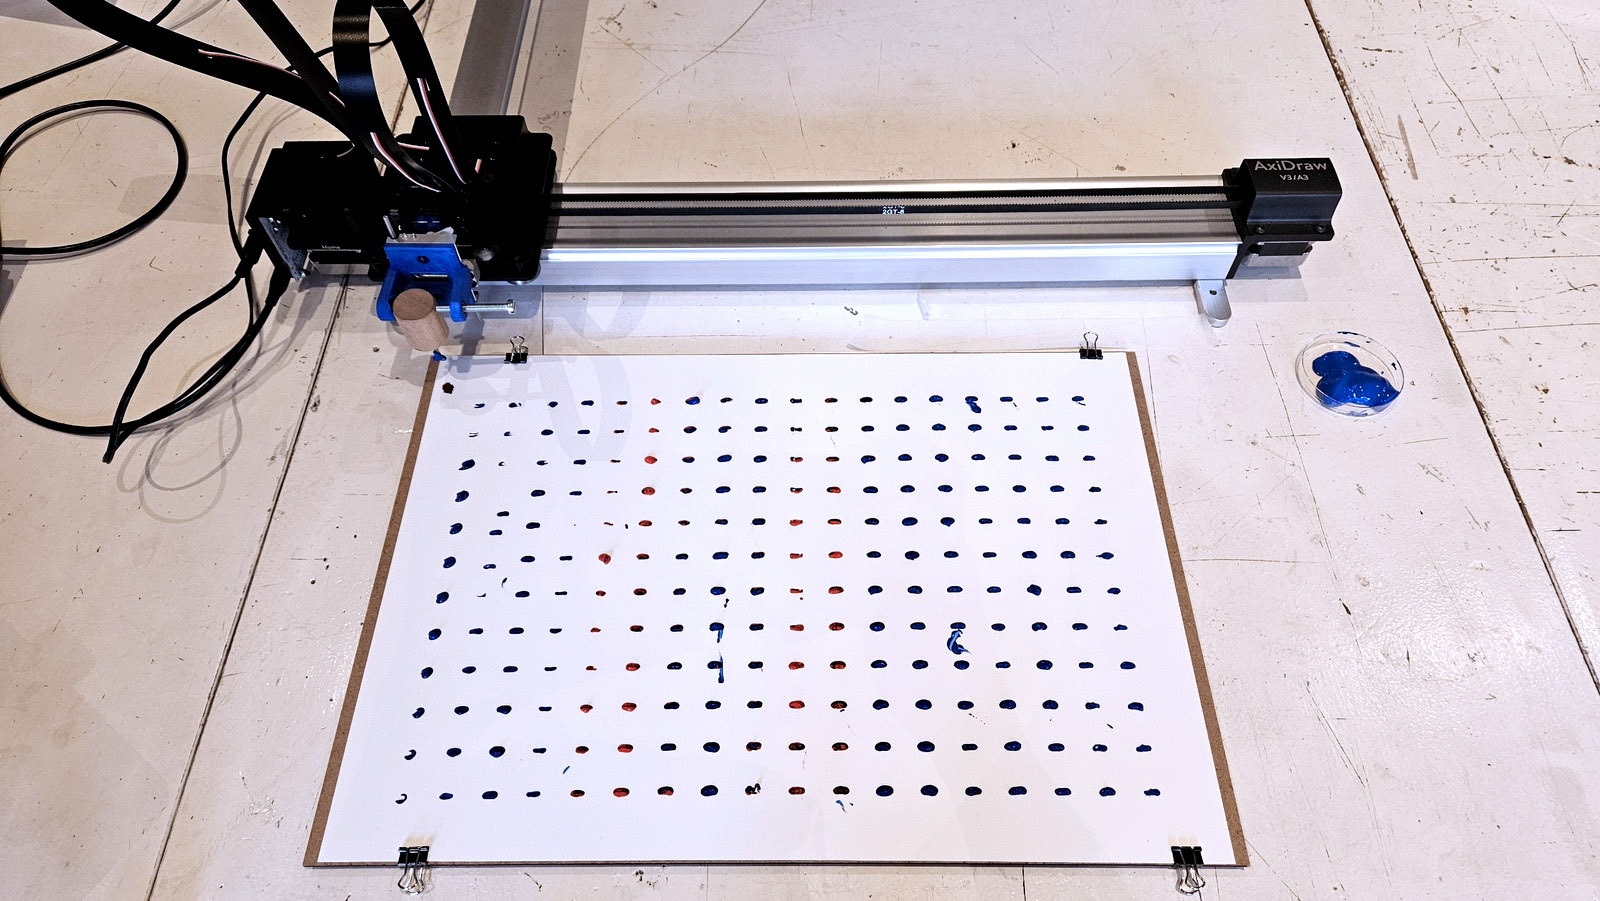
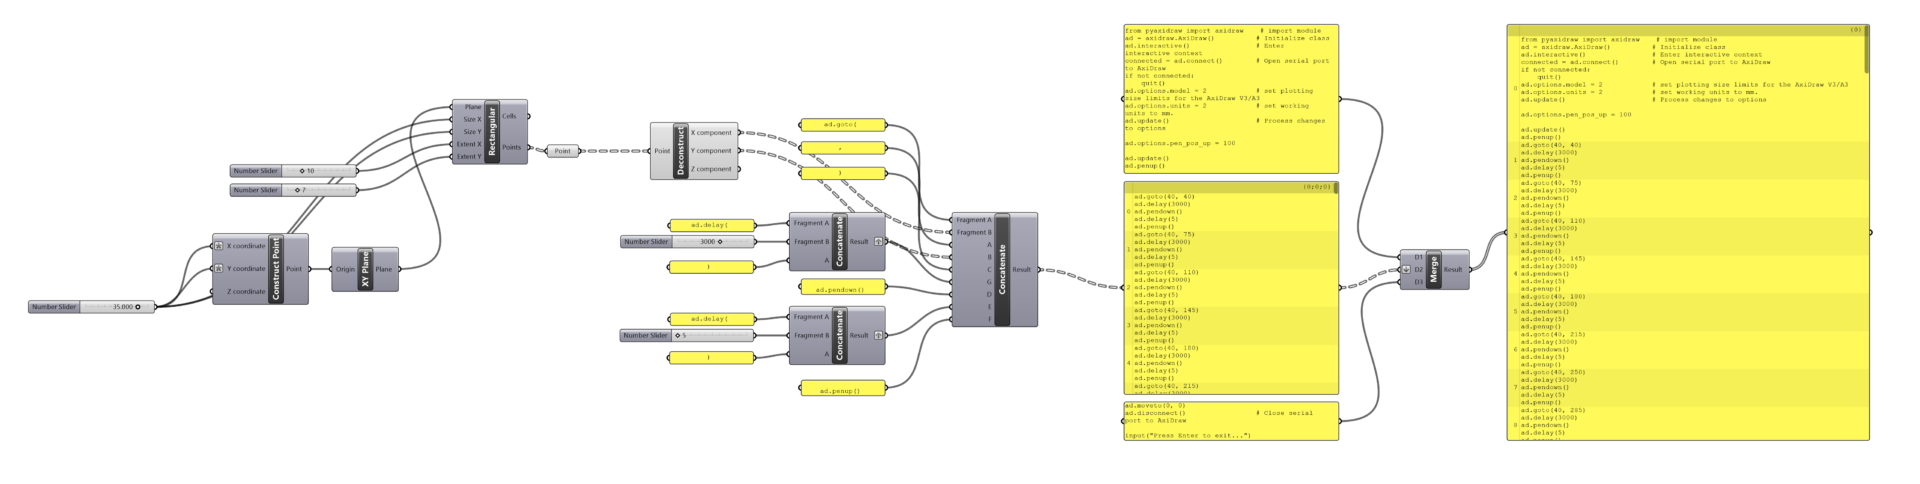
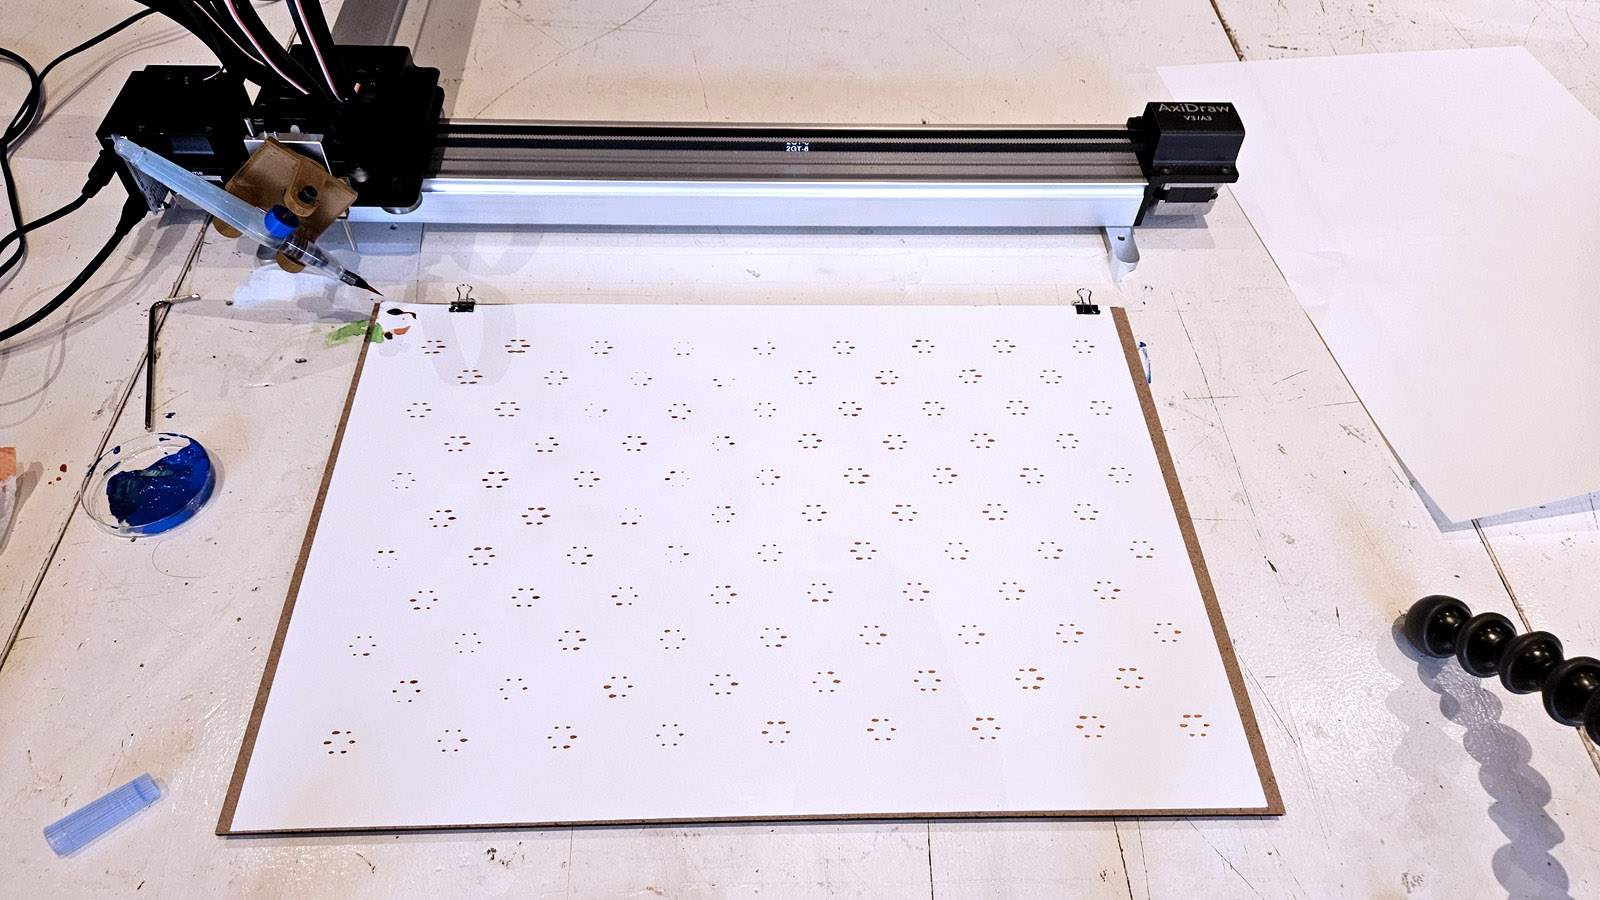
Grid 01 (the rectangular grid)
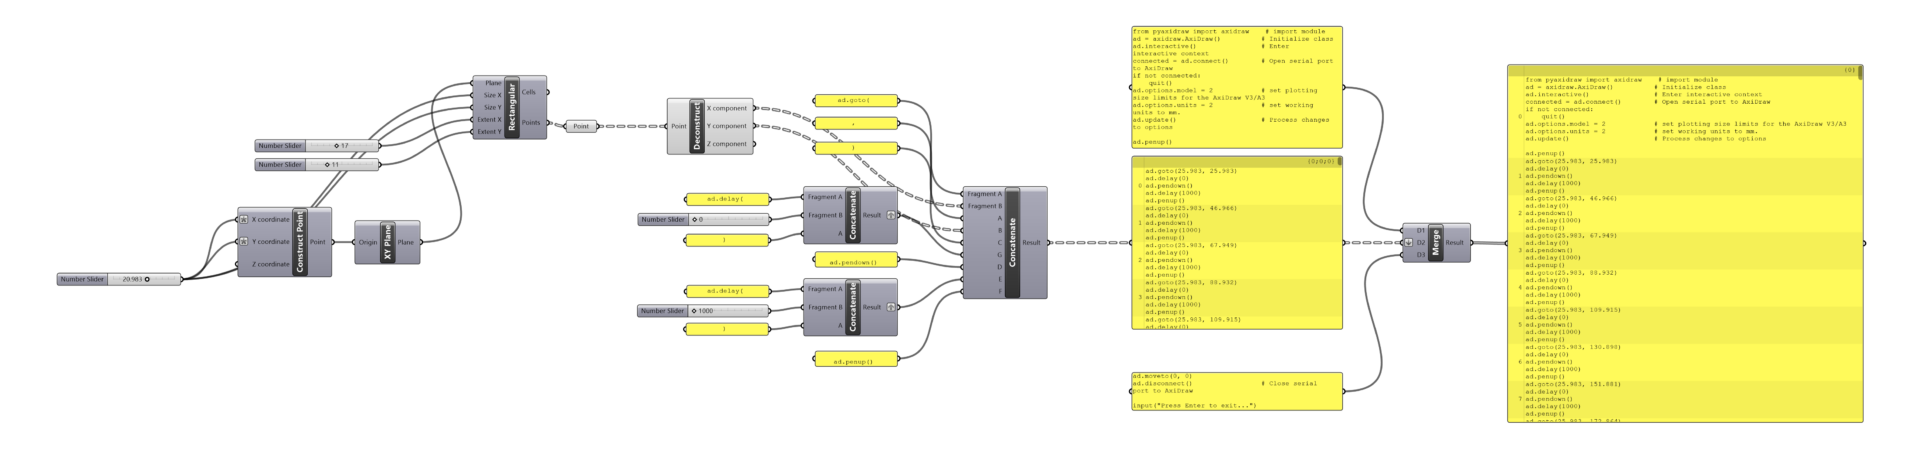
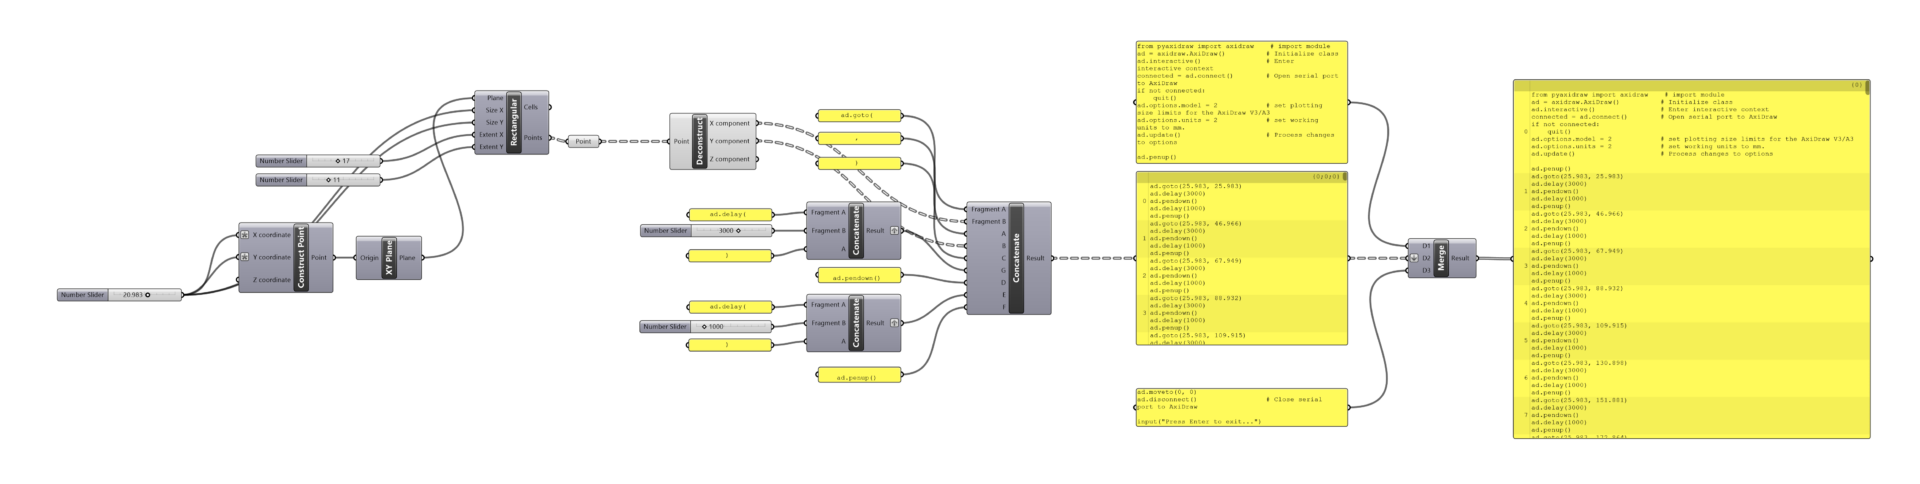
Grasshopper file

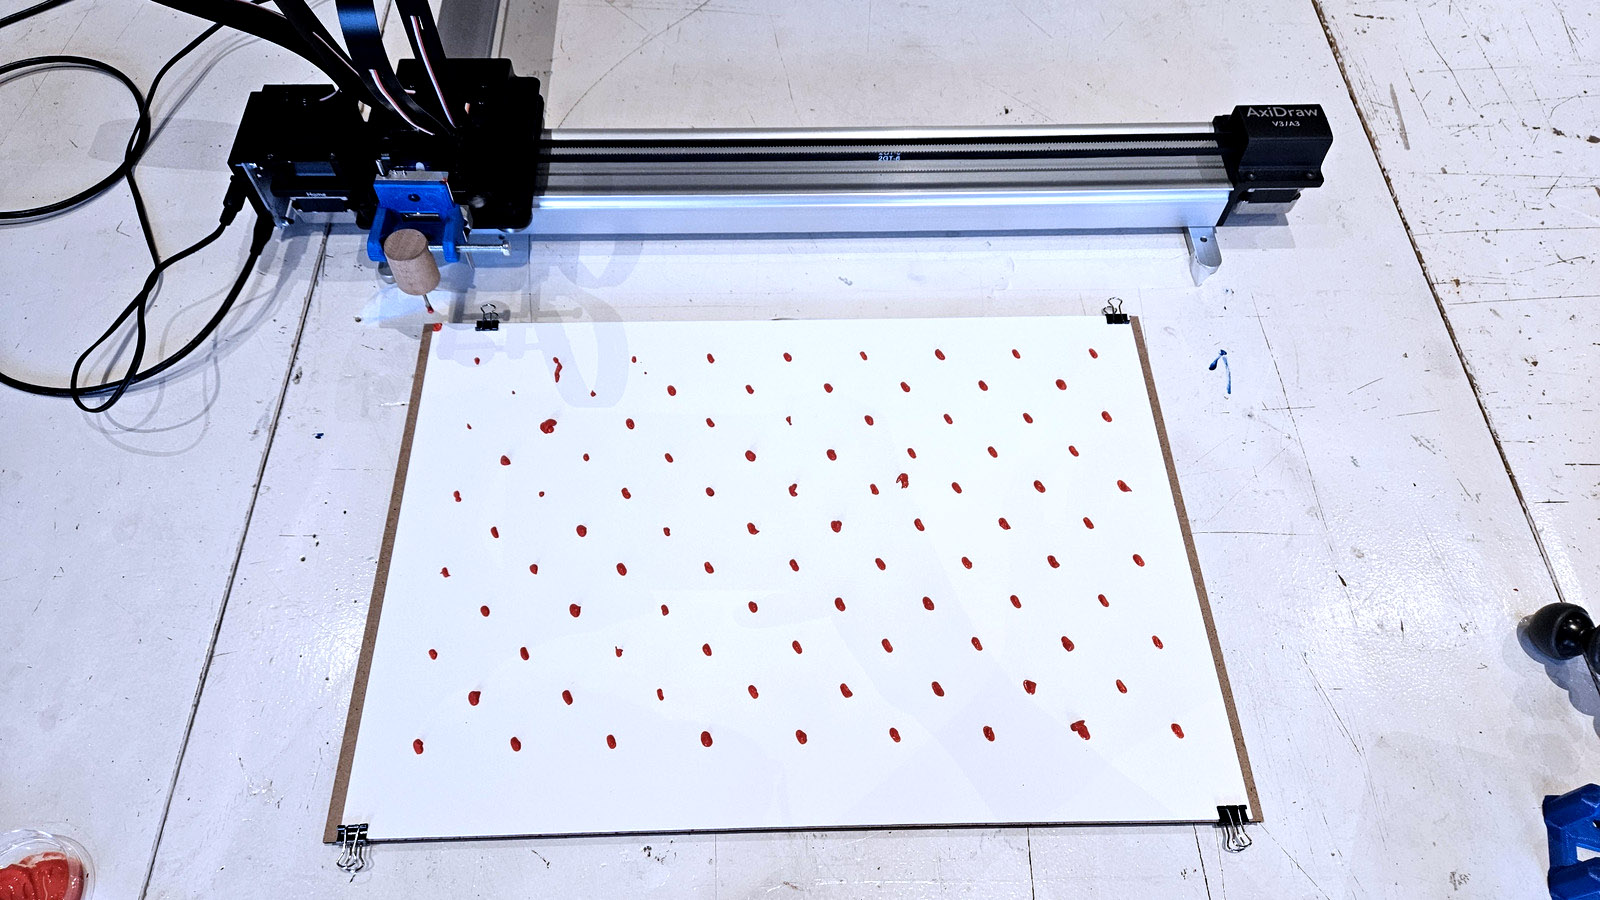
Experiment 01 – static tool holder
We noticed immediately that the way we are working with the machine now, a constant dialogue (with or without words) between Aslı and Michelle is important. Michelle started preparing the pen was placed way before Aslı was ready, causing the ink to leak out. A dance between the two should exist: it’s a human-human-machine collaborative craft.
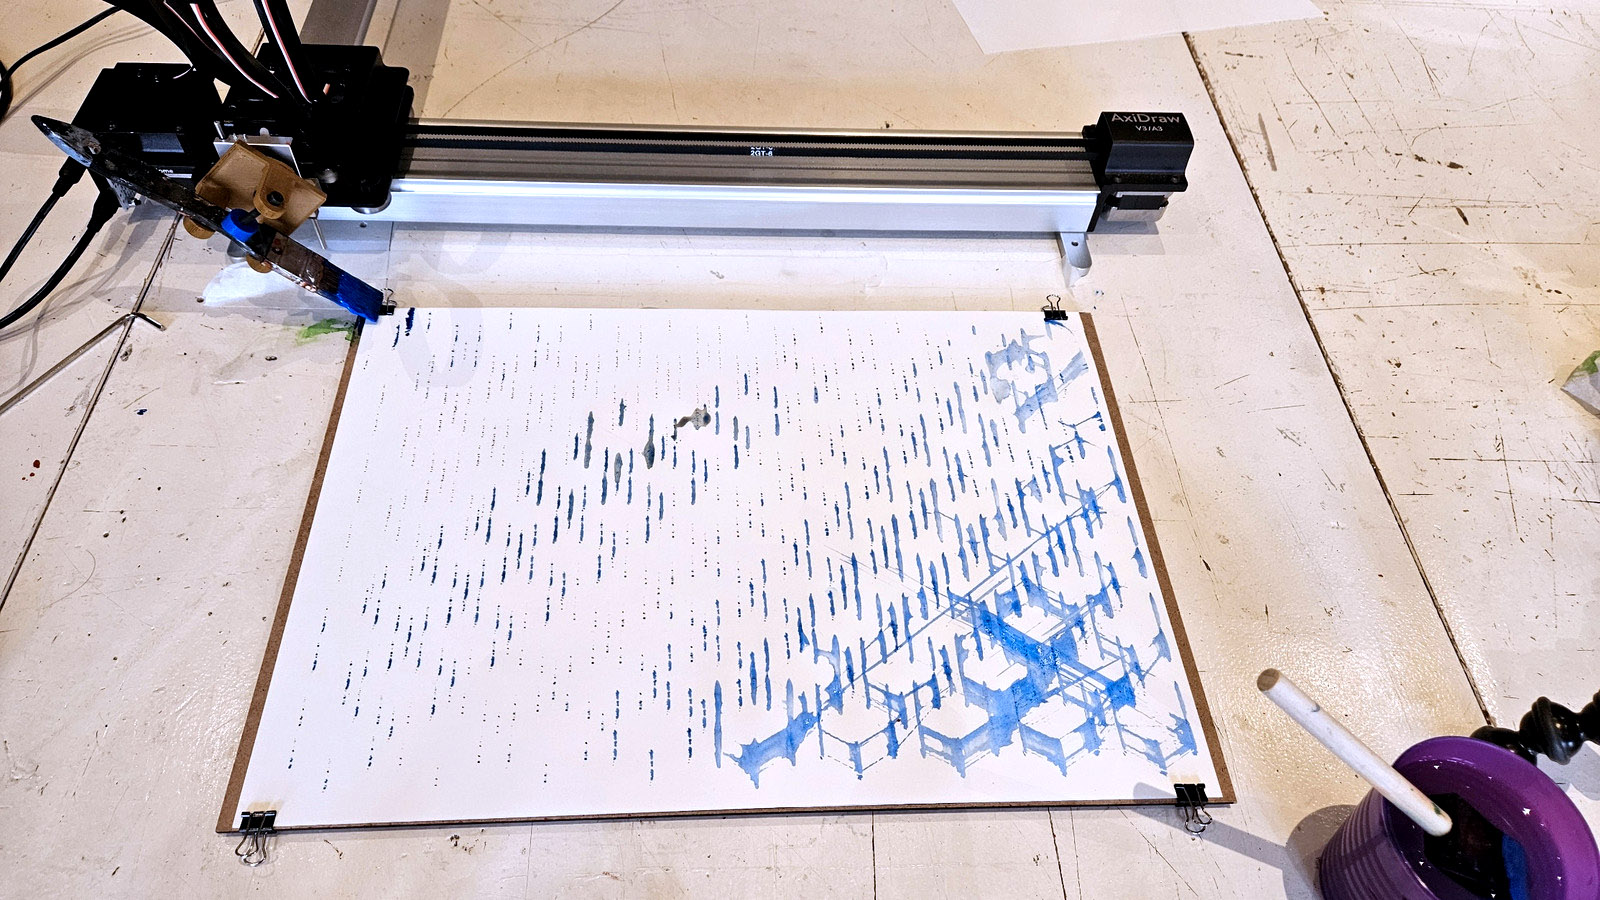
Experiment 05 – revolving tool holder
The same grid comes to life with using a tool holder of which the rotation speed and direction can be controlled. Now, each dot becomes a part of a circle, each different from the previous.

Grasshopper file

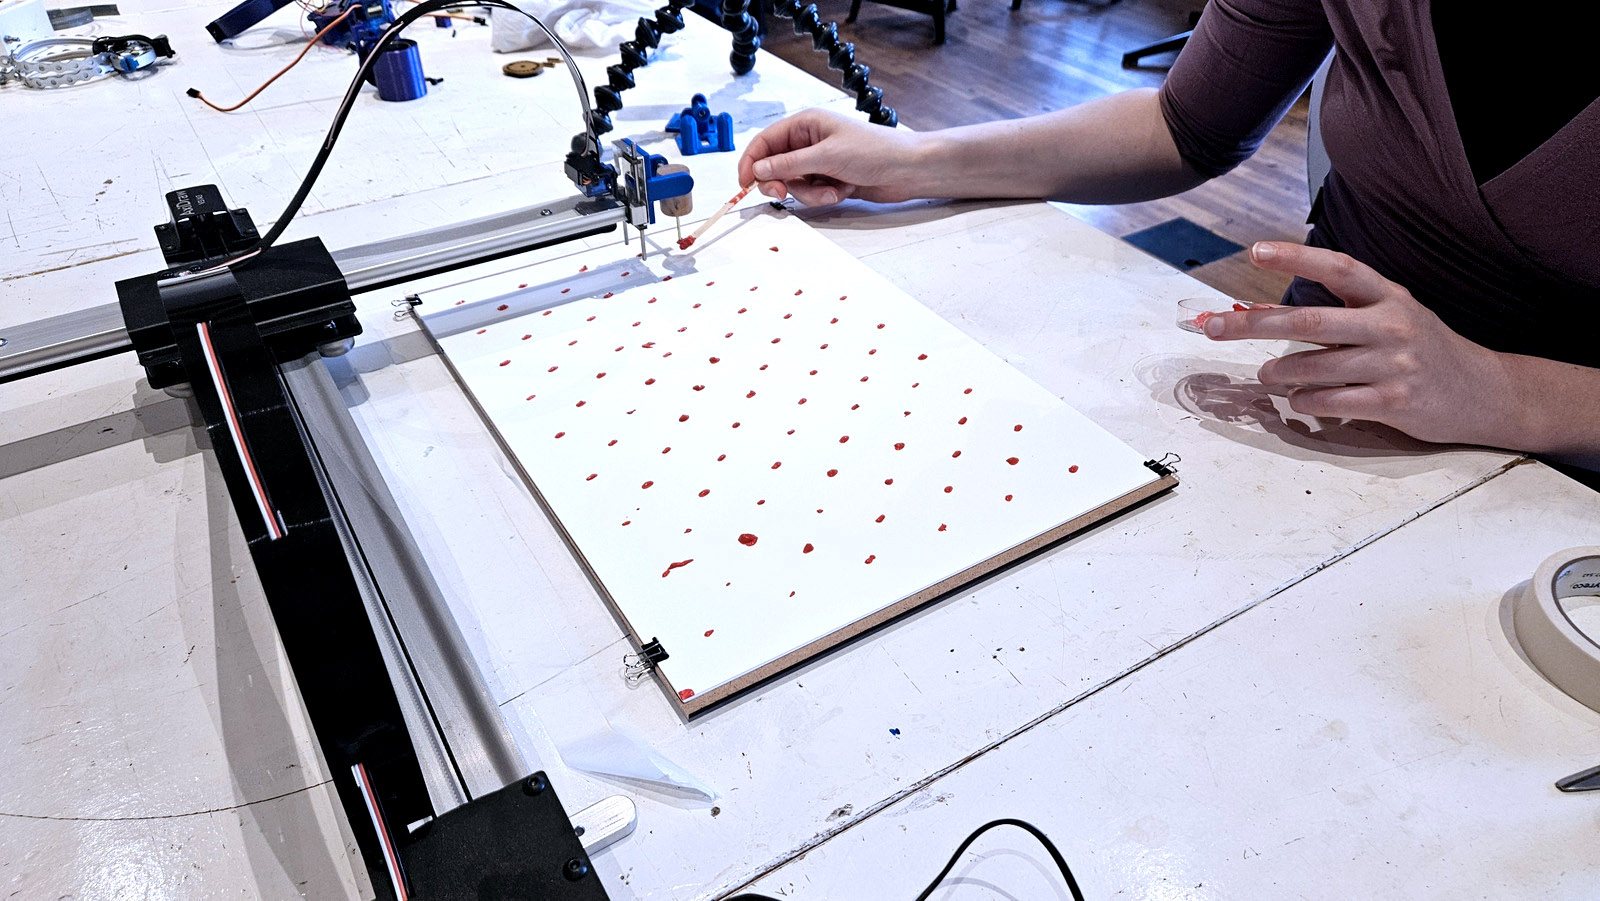
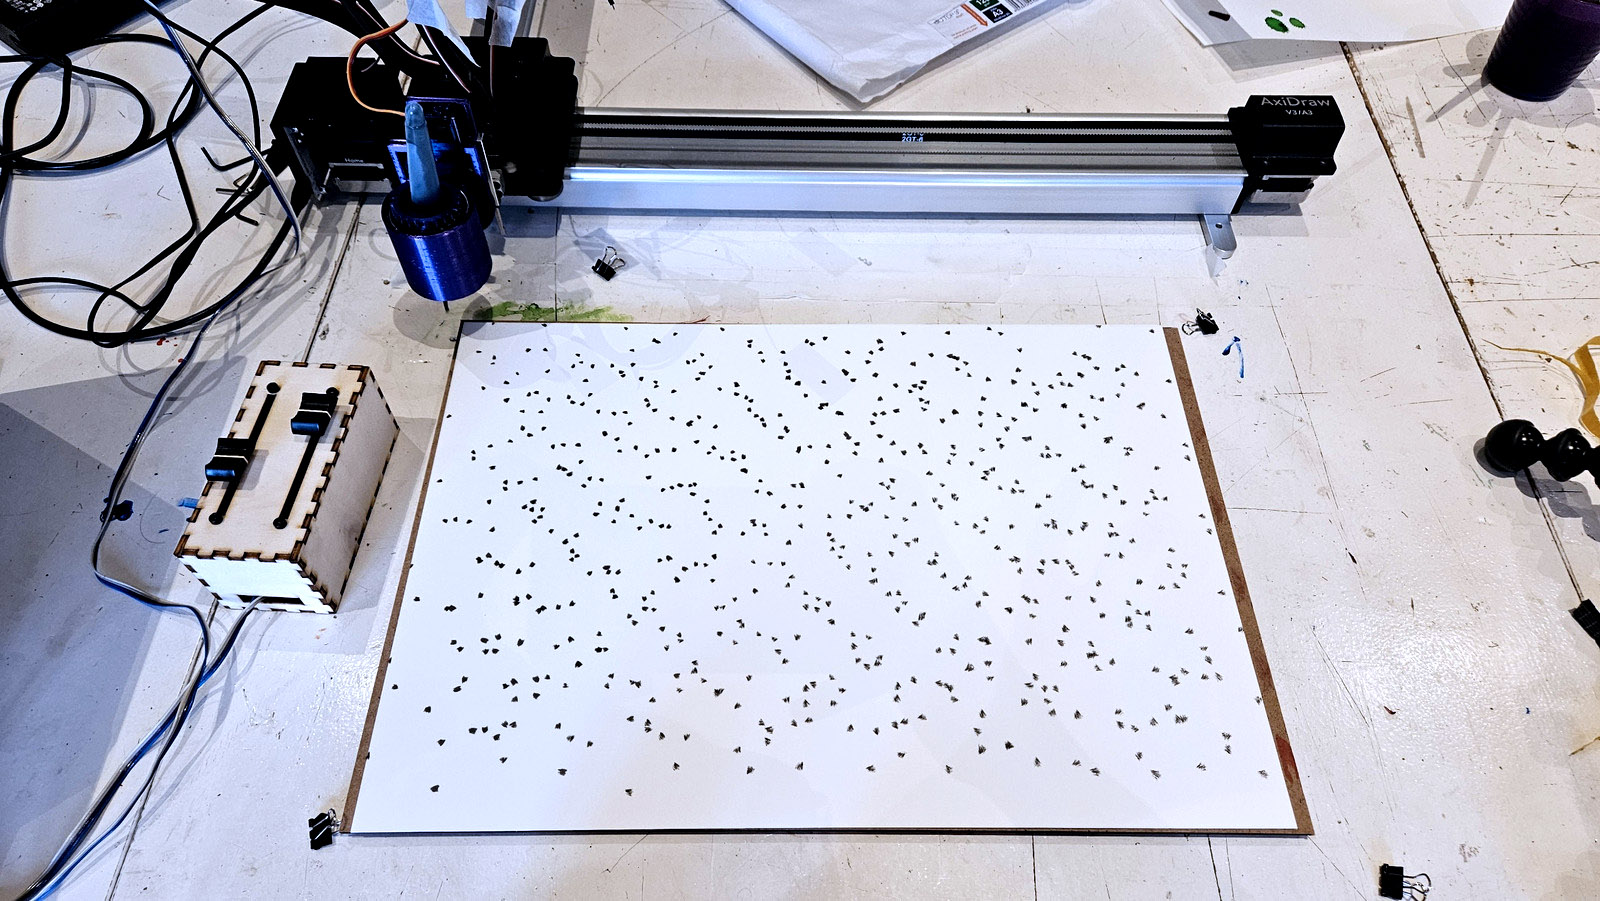
Experiment 02
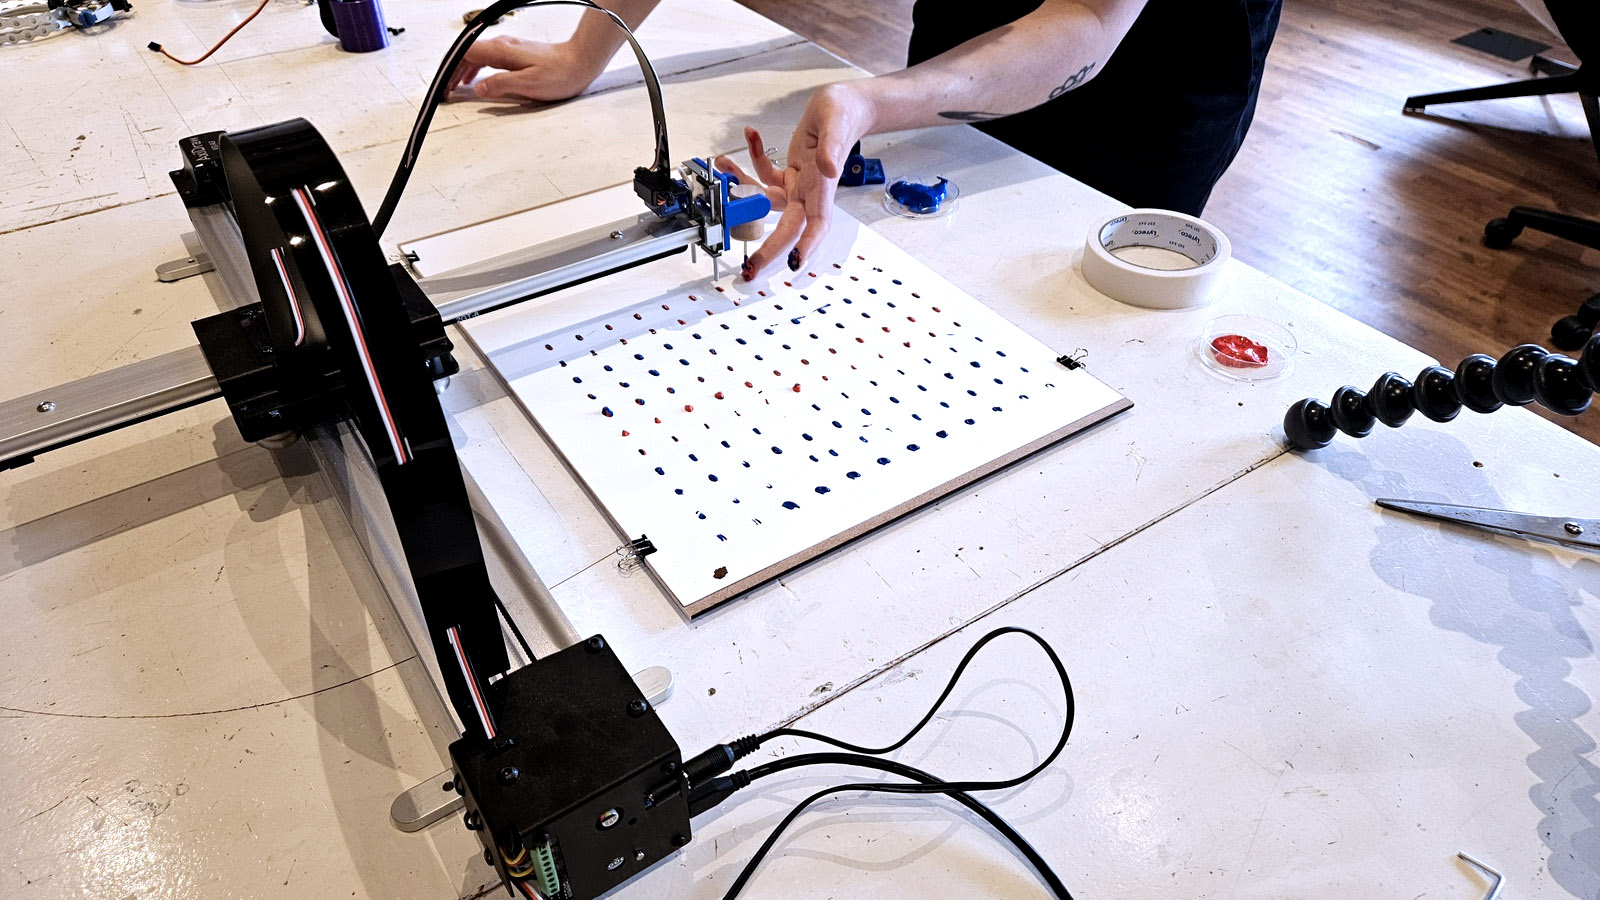
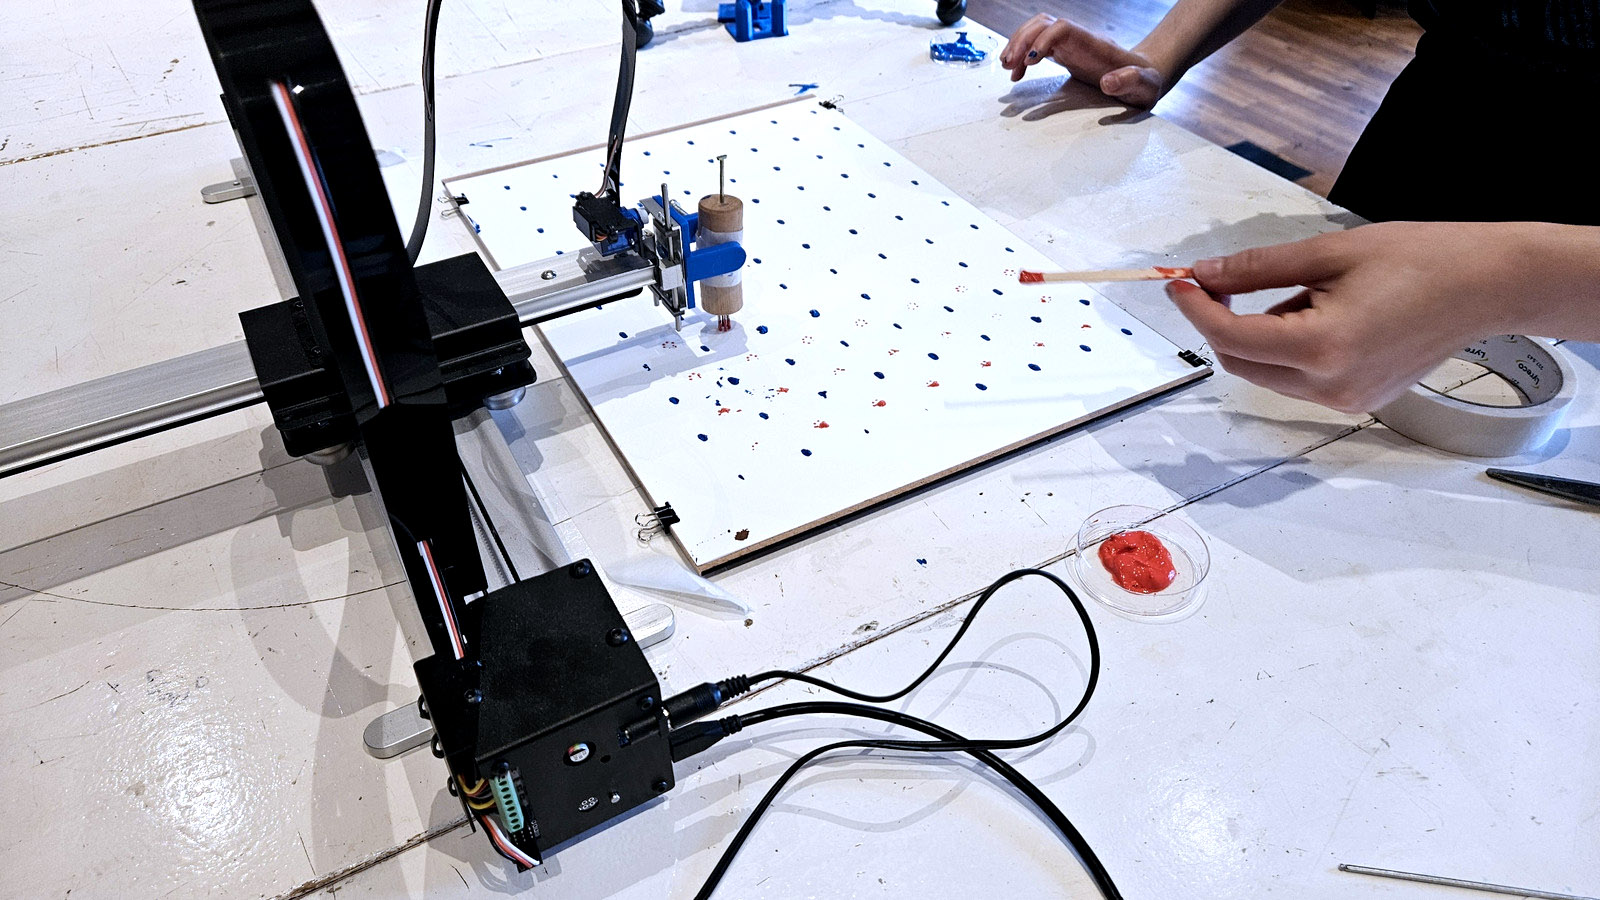
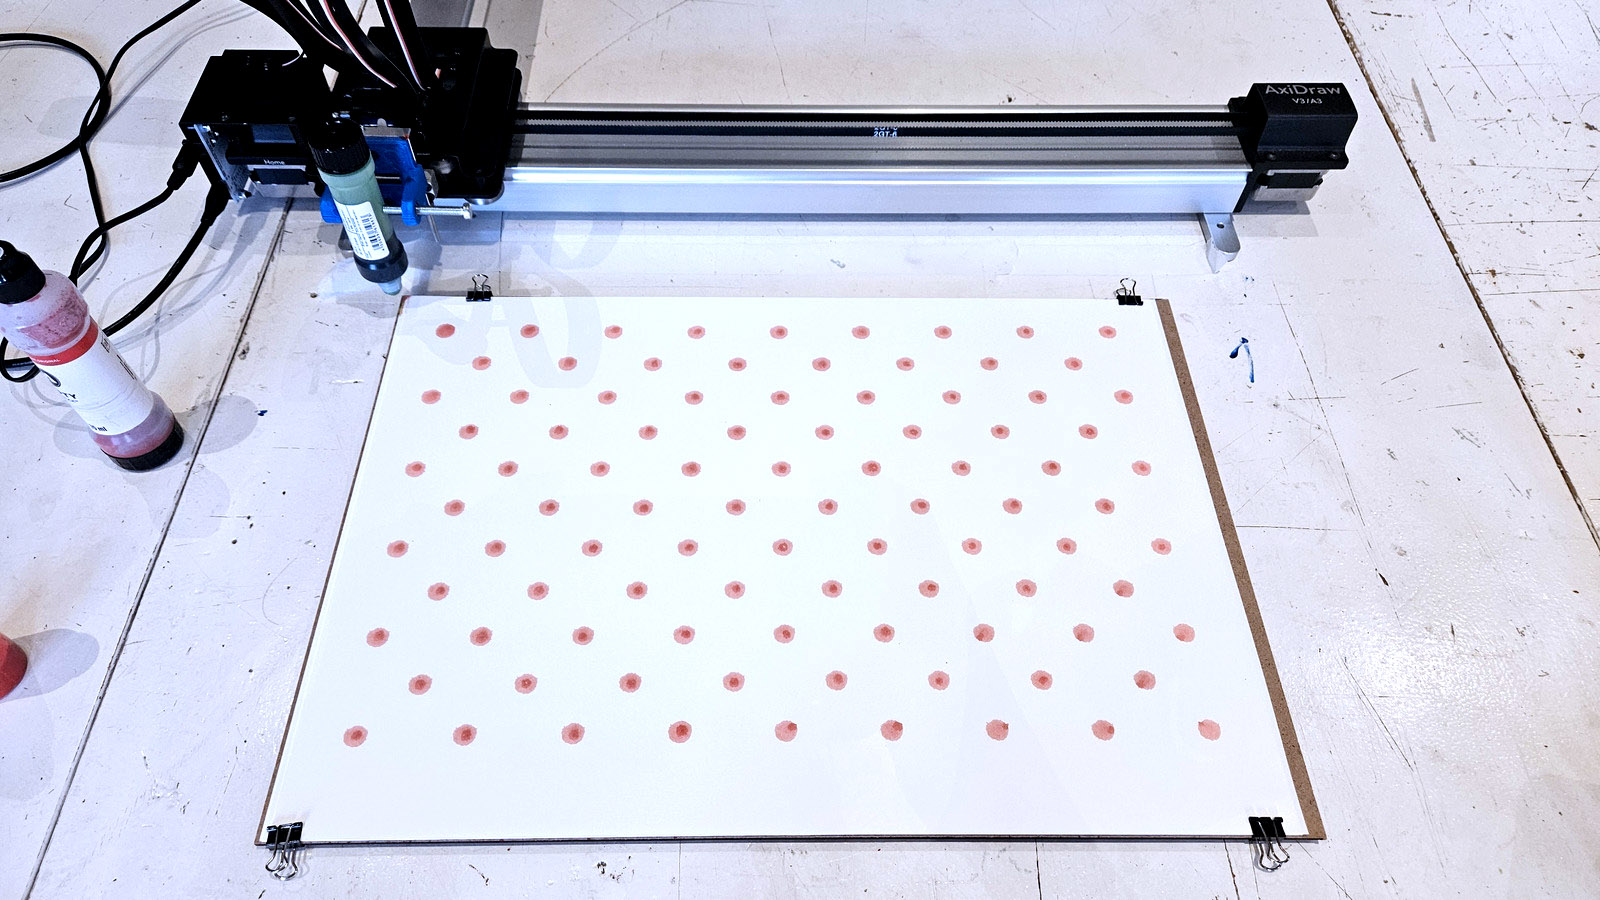
This experiment used a Staphorster dotworking tool.
The way the paint is applied to the tool and paper is essential to how the end product comes out. In this experiment, Michelle started with a small petri dish as a portable medium reservoir, but quickly found out that that didn’t work because the tool did not go up enough. She changed approach to using her fingers as reservoir, which worked surprisingly well. According to Michelle it feels like you are closer to the machine (working together with the machine) and more involved in the process: you are becoming part of the machine by becoming the reservoir (or the other way around), and you become an active and essential part of the process. Although this is probably not the way the Staphorsters like it to be done she is enjoying the process. It is not necessarily peaceful but she is in the ‘zone’: you have to be focused and constantly react to what you see on the material and on the tool.

While plotting, you have to learn how the different amounts of paint on the tool creates different effects on the paper. The goal is a well rounded three dimensional dot, which is tricky to get (we are also not using the correct paint so the viscosity is off), especially as the tool and your fingers get messier throughout the plotting process. When the paint is on your index finger it’s easiest, but when it’s on your middle finger it’s harder to control the amount of paint placed on the tool, since it’s a finger that you generally don’t use as much so it feels less natural. Maybe it would be nice to have a custom tool to hold paint to wear on your fingers.
Midway in the making of grid 01_ exp02 we decreased the amount of time for the machine to go down to make the process faster; working this way is not really faster than doing it manually but you get a very neat grid.
Grasshopper file

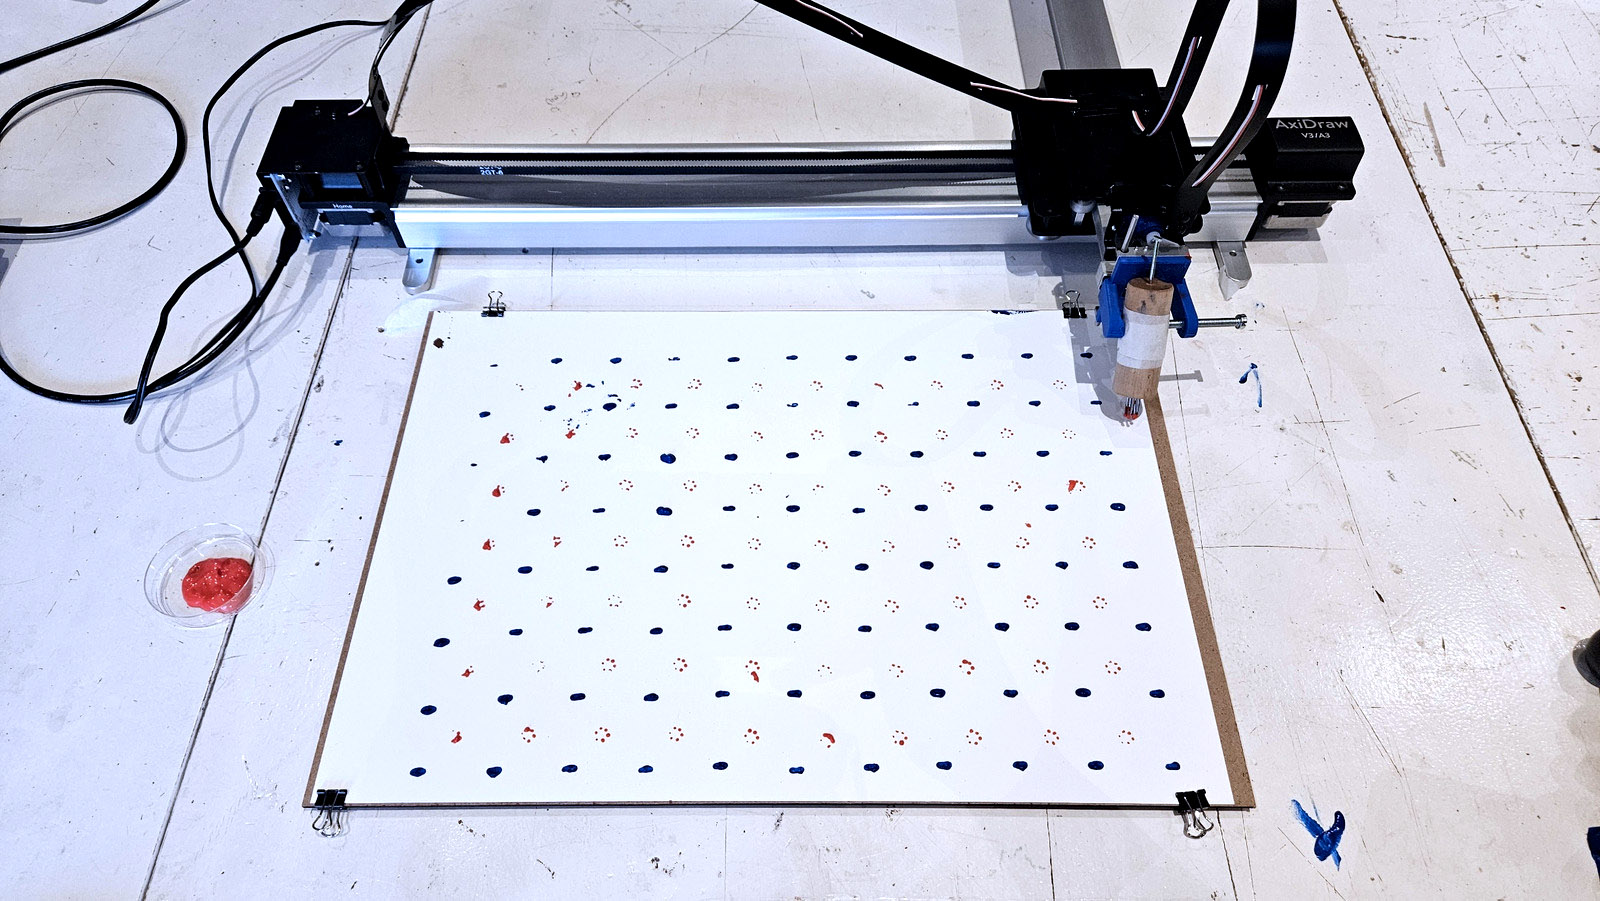
Experiment 03
Here we ran the same file twice but with a different tool the second time, and with an offset of the material. Asli changed the default pen height when it was up, so the petri dish would fit under. The second tool consisted of 6 pins placed hexagonally, which was harder to apply paint to regularly. When the paint is not placed directly under the tool it also gives a different texture to the output. Isabel noted that this was also something they observed during the workshop they did in Staphorst. With the programmed delay you don’t always have enough time to fix paint clots. Michelle started using a wooden stick to apply the paint during the second run, this looked better.
While running this experiment, we are talking about language used in craft versus language we are using. We’re looking for overlapping concepts and new words for processes, roles and tools. An example of a role in our craftsperson 2.0 is Aslı as the machine operator and Michelle as the one performing with the machine (the operator and the practicioner?); both could be described as hybrid craftspeople. The social aspect of the craft – chatting while creating – is part of the experience, just like with dotwork. Michelle mentions she needs to be very aware of her body while applying the paint or the results are stains on the canvas or moving the tool – it’s an embodied process.
Experiment 04
For the next experiment (not this one), Asli was trying to get a diamond shape grid in Grasshopper because this is a grid that is more common in dotwork, but it was a little more difficult with the way that the Grasshopper file was set up. While Asli is making the other grid we kept experimenting with other grids so we wouldn’t waste time waiting for each other. The diamond shape grid is also created through experimenting and, what seems to Karmijn, through knowledge only Asli only has. Michelle in the meantime is experimenting with moving the canvas around manually while plotting (after the first three columns had been plotted), talking about maybe creating a movable grid that can snap into different positions. Asli (now not bothered by Michelle’s impatience) figured out how to make the new grid.
Here the personalities of the people working together caused us to find ways to move forward without restricting each other – Asli works in a more focused, methodical way while Michelle works more intuitively and doesn’t want to stop.
Grid 02 (the diamond grid)
Grasshopper file


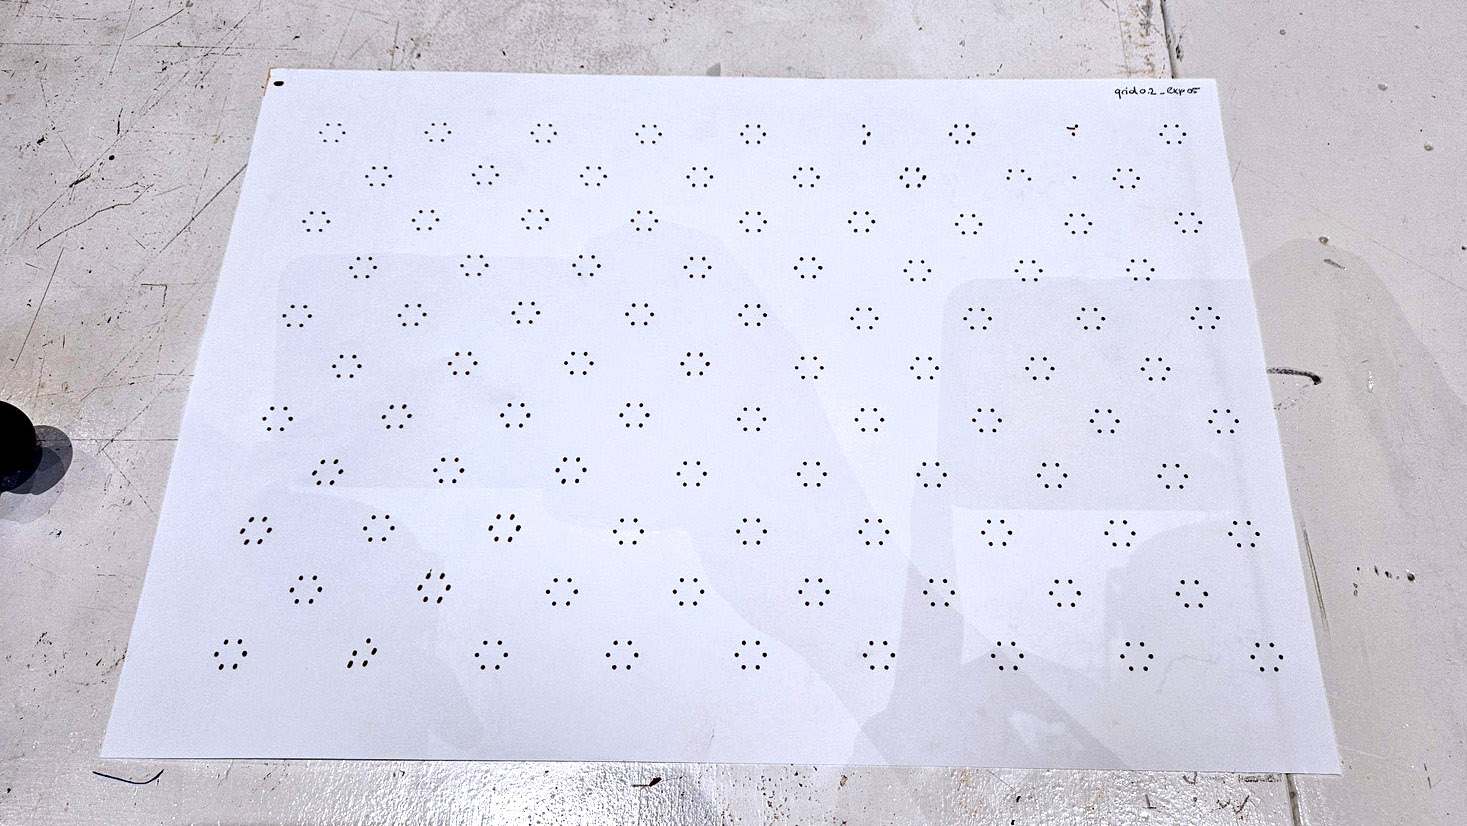
Experiment 01
With the newly made diamond shape grid we tried out the first dotworking tool again, this time rotated slightly. Karmijn was interacting with the machine this time. Asli and Michelle told her that she placed the dotting tool too high, but she wanted to try it out anyway to see if placing it higher would smudge the paint less, giving it a better shape. In the end no paint touched the canvas, the tool was readjusted and the file started again. Karmijn noted it is difficult and interesting to see: it is a very focused experience, you need to create a dance with the machine and respond in time.
Grasshopper file


Experiment 02
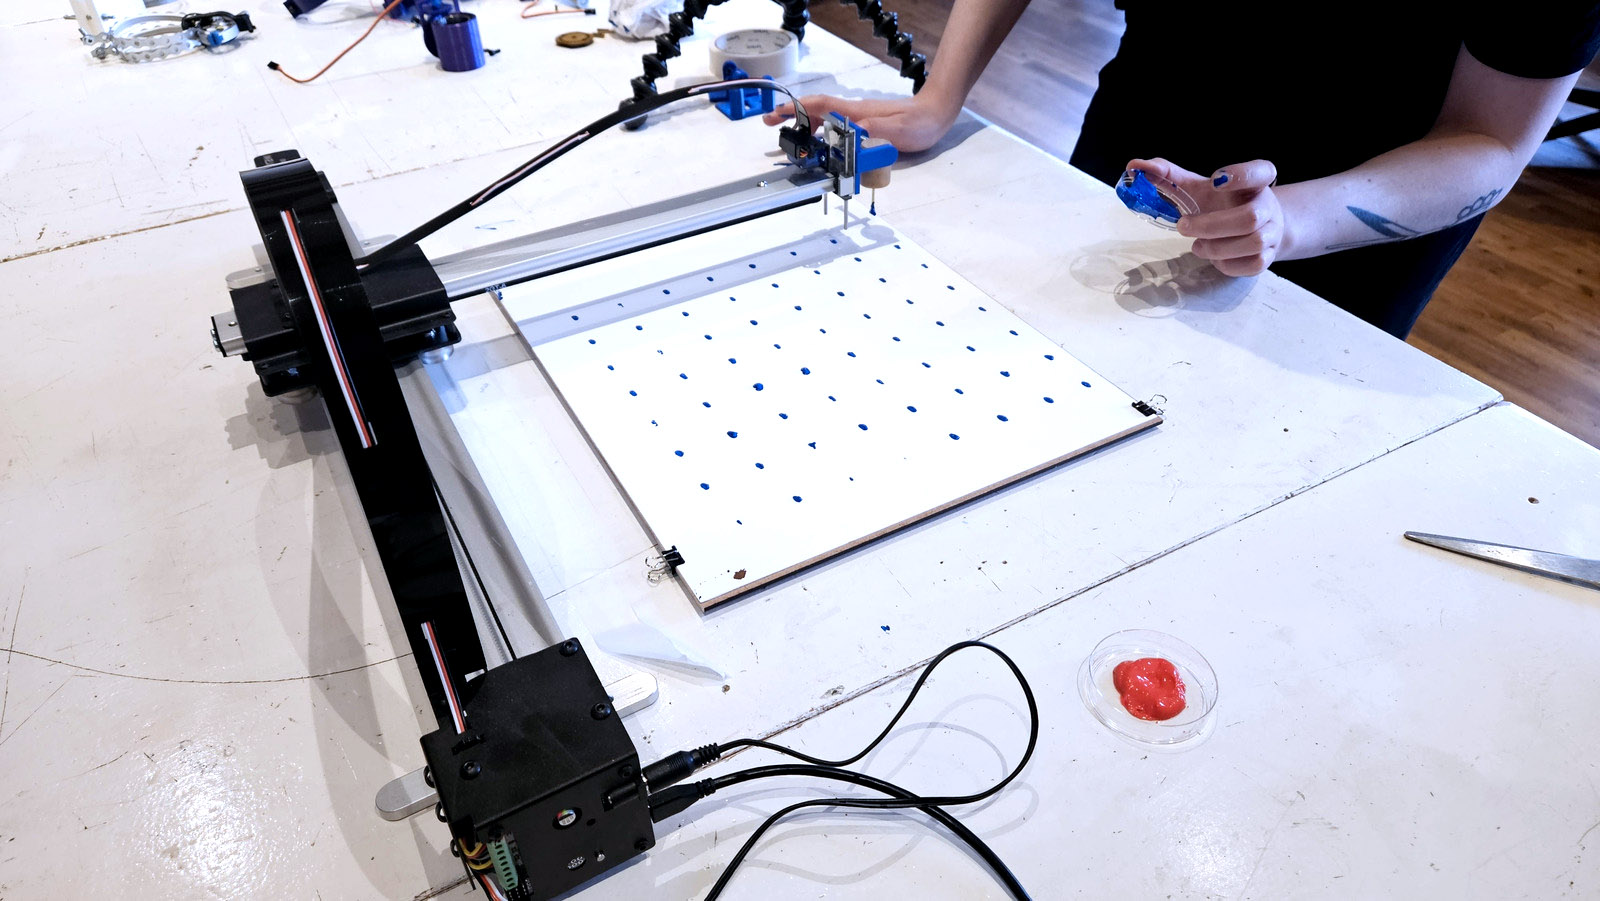
Here we are shifting to a different medium, a fuzzy tipped Molotow Dripstick with an internal reservoir. Someone passing by the experiment mentions the grid system we have is exactly what she needs; she is weaving, and needs to put a grid on the weaving pattern, so that was a very relevant comment to us, relating our pilot to other crafts within the craft ecosystem.
Whereas the previous experiments where very involved, this time we didn’t have to do anything at all. You can see the difference in body language: just sitting around, waiting while the machine is doing the work.

Experiment 03
Interesting to note here is that when the second colour is added to the design with a different Molotow empty marker (a Dripstick Rollerball) the process becomes involved again: the Axidraw doesn’t press the roller hard enough into the surface and Michelle needs to help the tool by pressing down on it. This created new ways of interacting with the machine, the pen is held by the machine but the dot is only deposited with human help. Cecilia mentions we have to look at a plotting pen pressure mechanism made years ago in the Waag fablab, that is archived somewhere; the fablab manager may know where (note: knowledge that is online but hard to find is still in the minds of the people that were there).
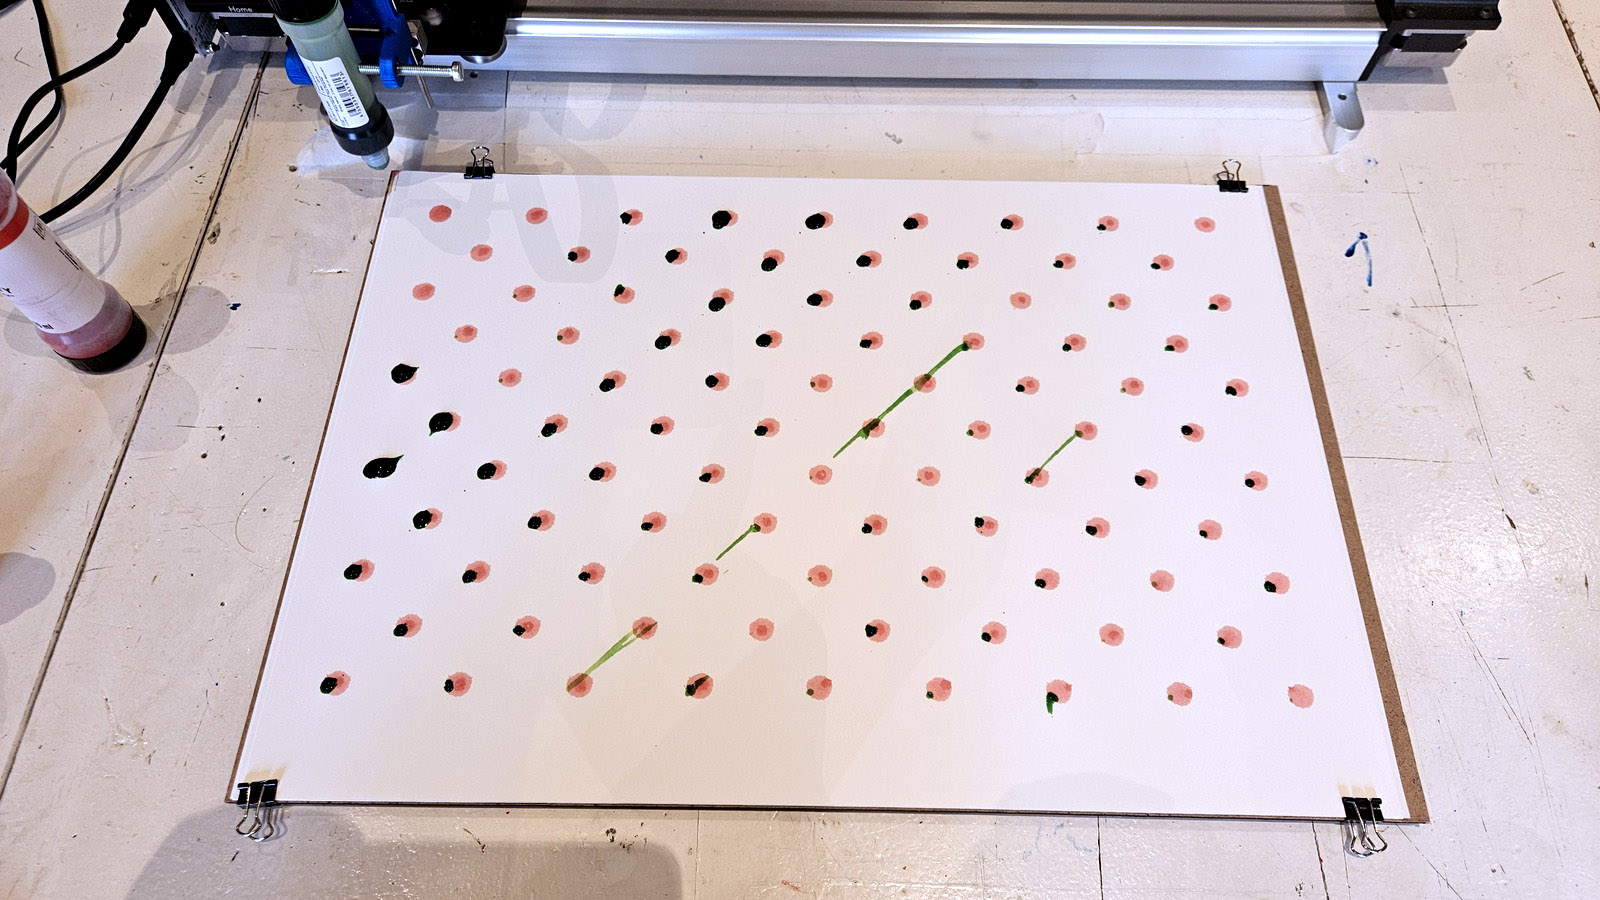
Experiment 04
The same file but trying something else; Michelle lowered the marker a lot and tried to swing the marker back and forth manually to create a dynamic pattern (think: heart beat), but it’s not working out as intended because the machine went too fast for her to keep up and the ink wasn’t coming out smoothly. Karmijn noted she was only working with one hand so that may also have contributed to the failure.
Grasshopper file
Using the same diamond grid as a base we are imitating the Staphorster dotwork tool in code, first using a regular marker to visualize the grid on paper. There was a little conversation on how to call this file, since it is not a new grid but the same grid, however applied differently through Grasshopper. We decided to keep calling it grid 02 instead of grid 03.


Experiment 05
We now moved on to the second tool holder: the rotating one (here used in a neutral position anyway). The bolt wasn’t tightened properly, so there was a little bit of moving of the pen on the paper resulting in some of the dots being elongated. Another (obvious) observation is that if you have six times as many dots, it also takes six times as long. This is inconvenient especially when you don’t have to get involved in the process.
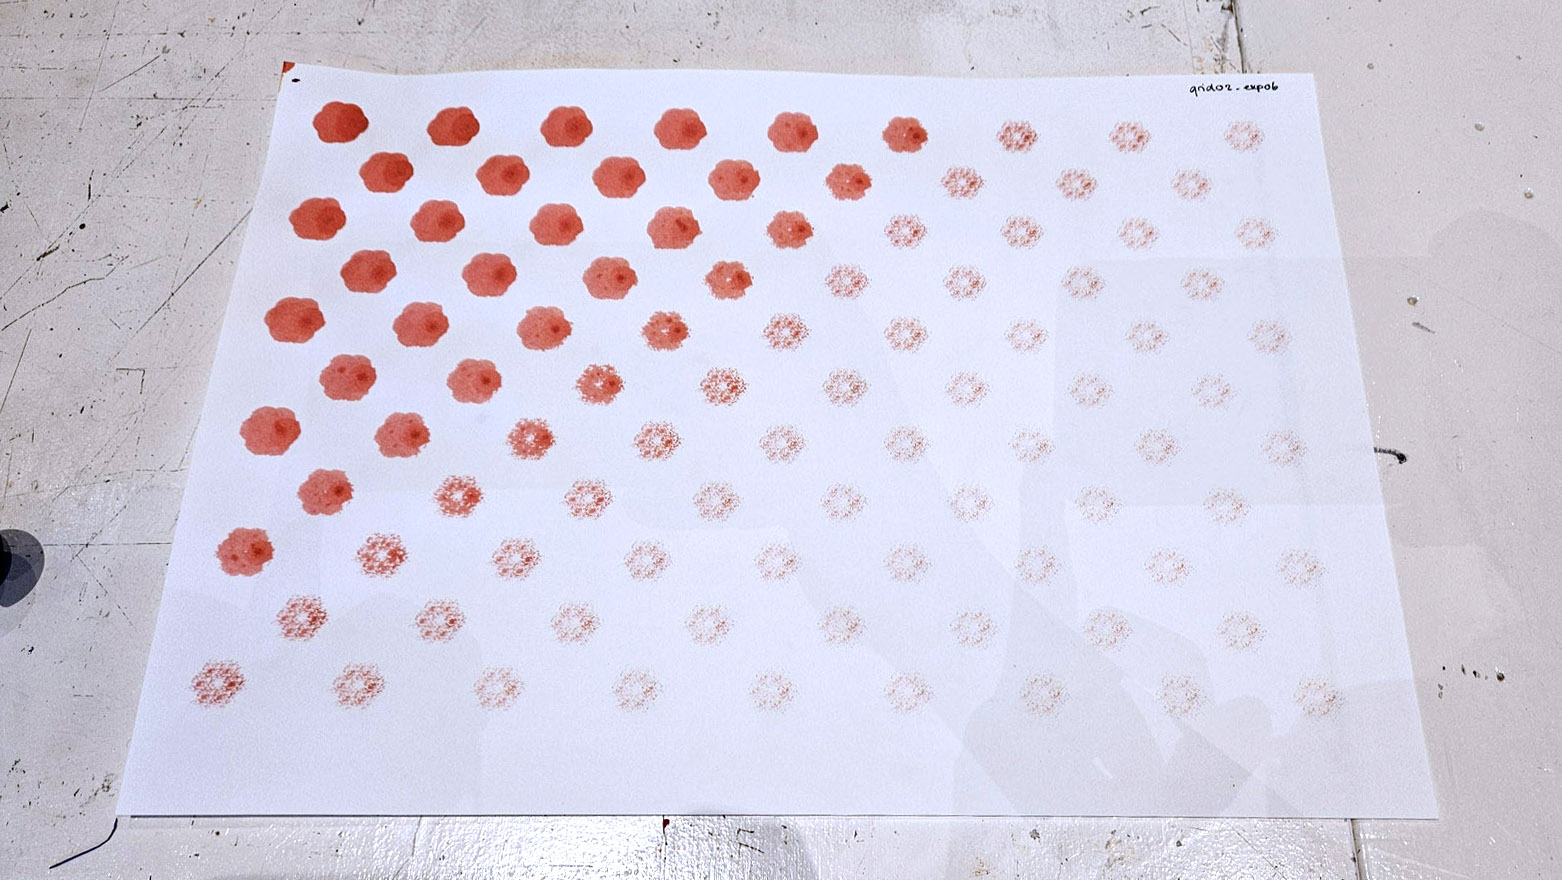
Experiment 06
Here we used the same Molotow Dripstick as before. Since the plotter didn’t need our help and it took a while, we left it running while getting lunch. The ink ran out halfway through (so it needed our input after all), but we really liked the faded gradient result.
Experiment 07
Now placing the rotating tool holder in an angle and using a foam brush with two different mediums on the brush, ink and paint. Michelle starts adding paint on the brush while doing the experiment since the brush didn’t absorb a lot of paint.
Experiment 08
Here we used a watercolour pen with an internal reservoir. Karmijn started squizing the pen halfway so more ink would come out. This gives a nice irregular (handmade) look to the dots.
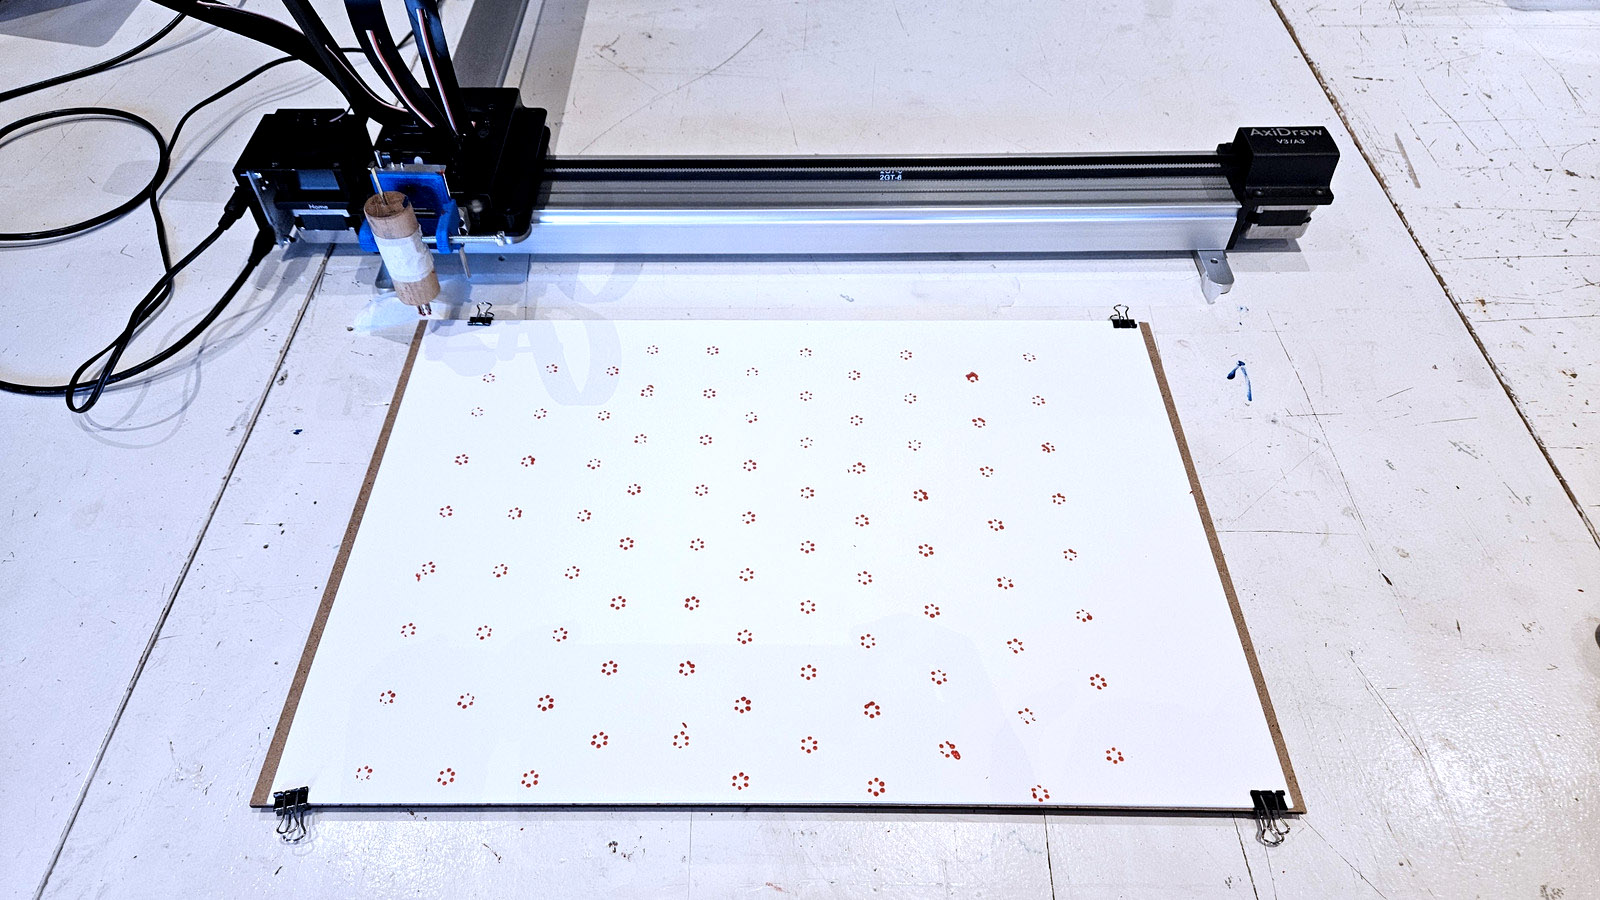
Grasshopper file
By increasing the offset of the six dots, the pattern moves away from the Staphorster tradition and becomes more dynamic.


Experiment 09
We moved on to a different, rectangular synthetic brush. From time to time we wet the brush, at the end a little too much. Cecilia asks if it is possible that the grids starts with one pattern and ends with another, and Asli says it is. This is something we want to explore further.
Experiment 19
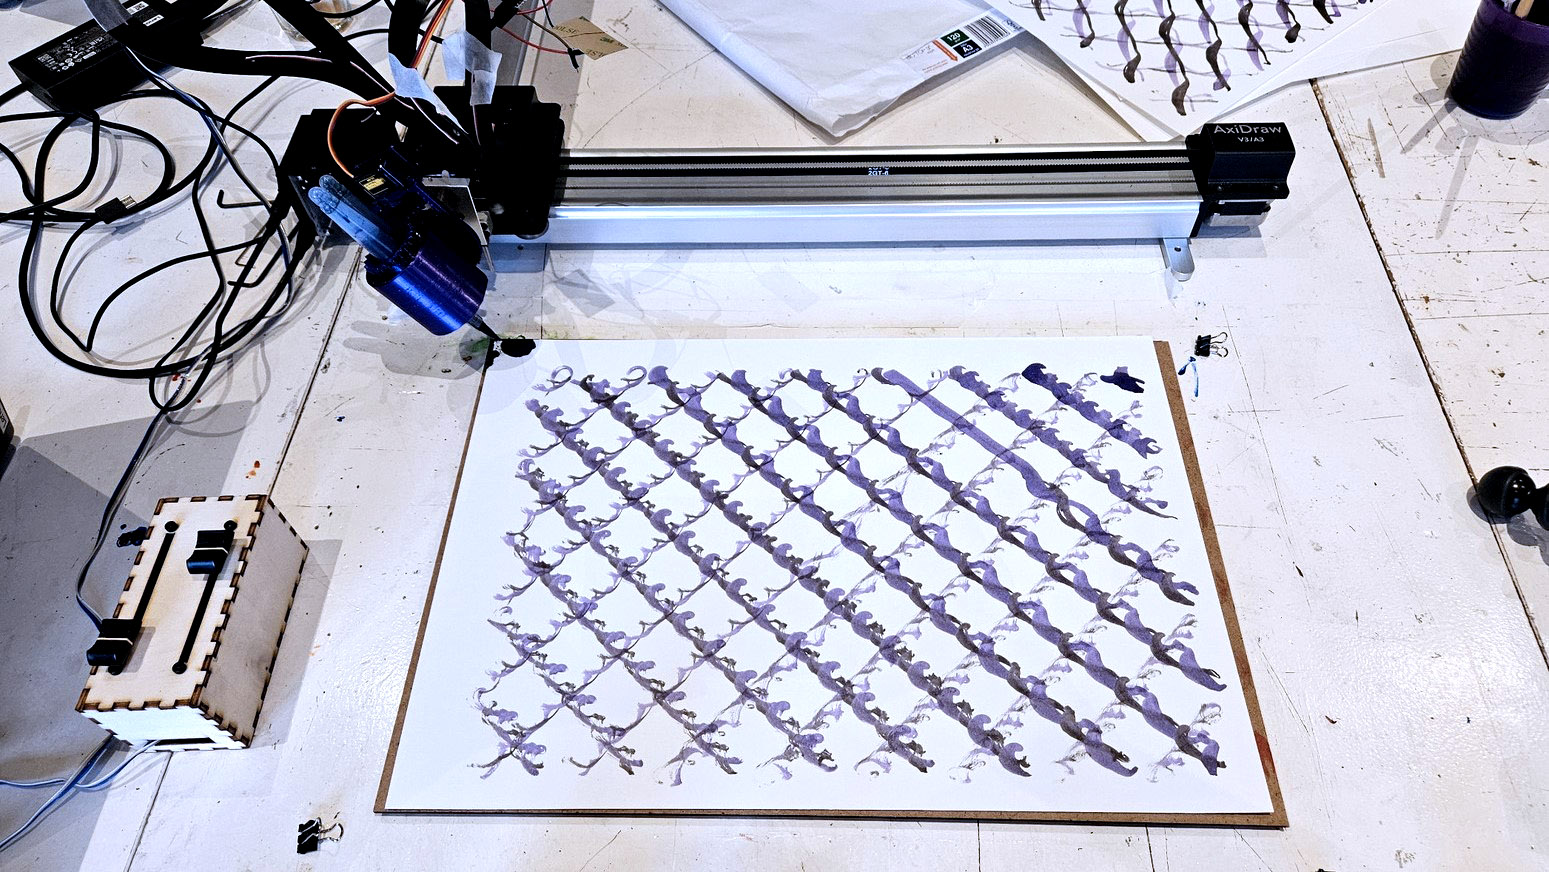
This later experiment uses the interactive, revolving tool holder. The brush is revolved back and forth while plotting the regular dotted grid, resulting in a somewhat random grid that still looks organized. You can still see a hint of the original grid.
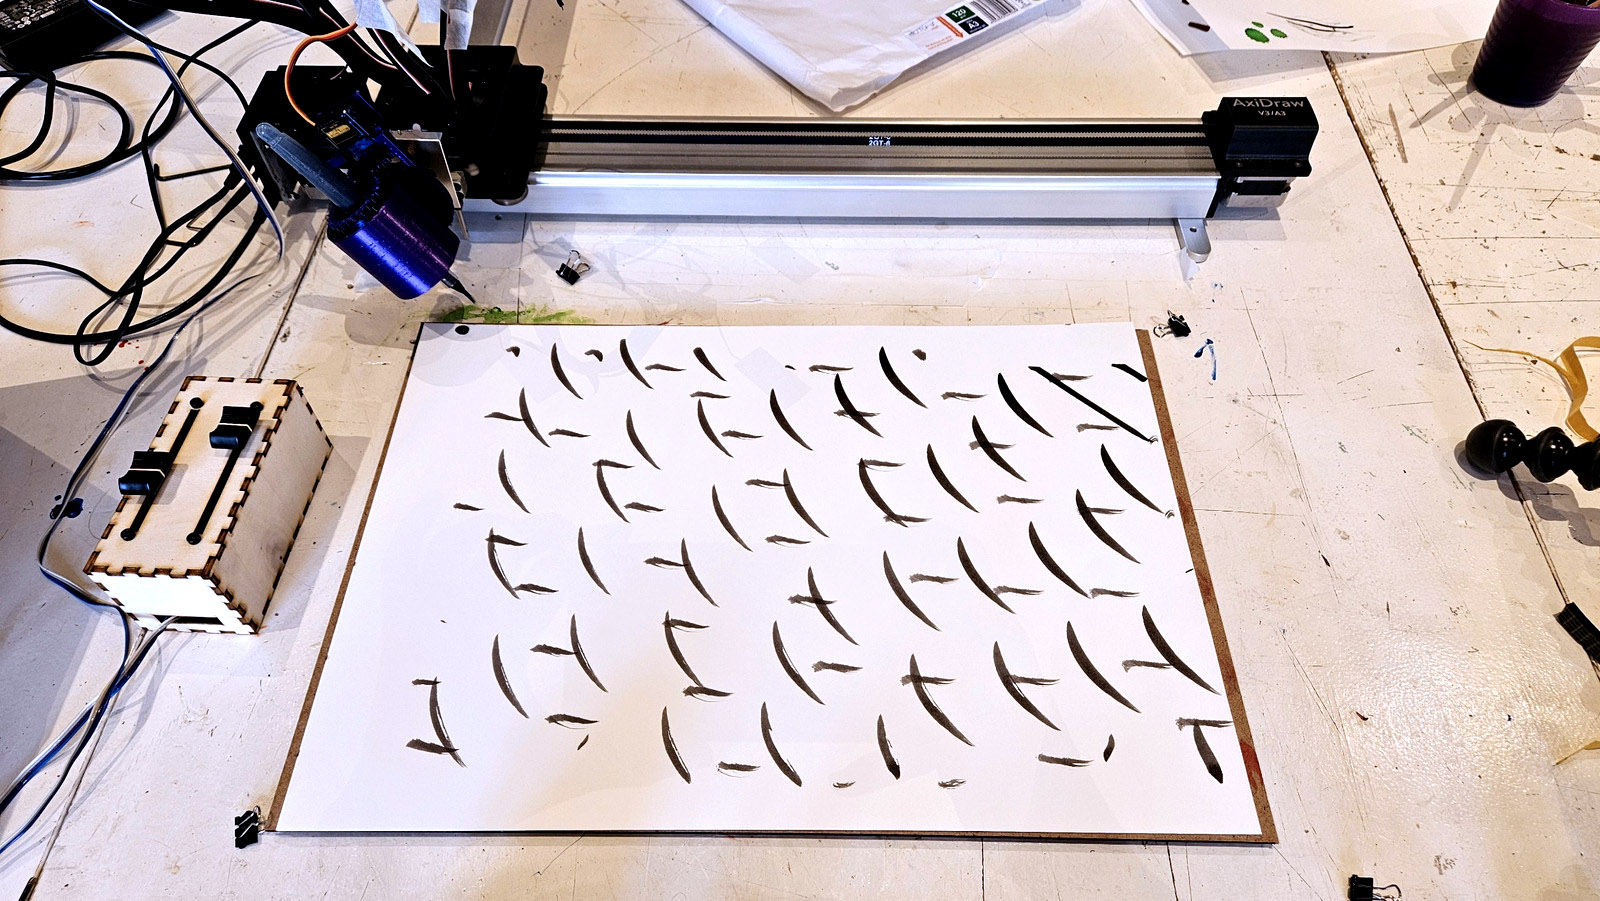
Grasshopper file
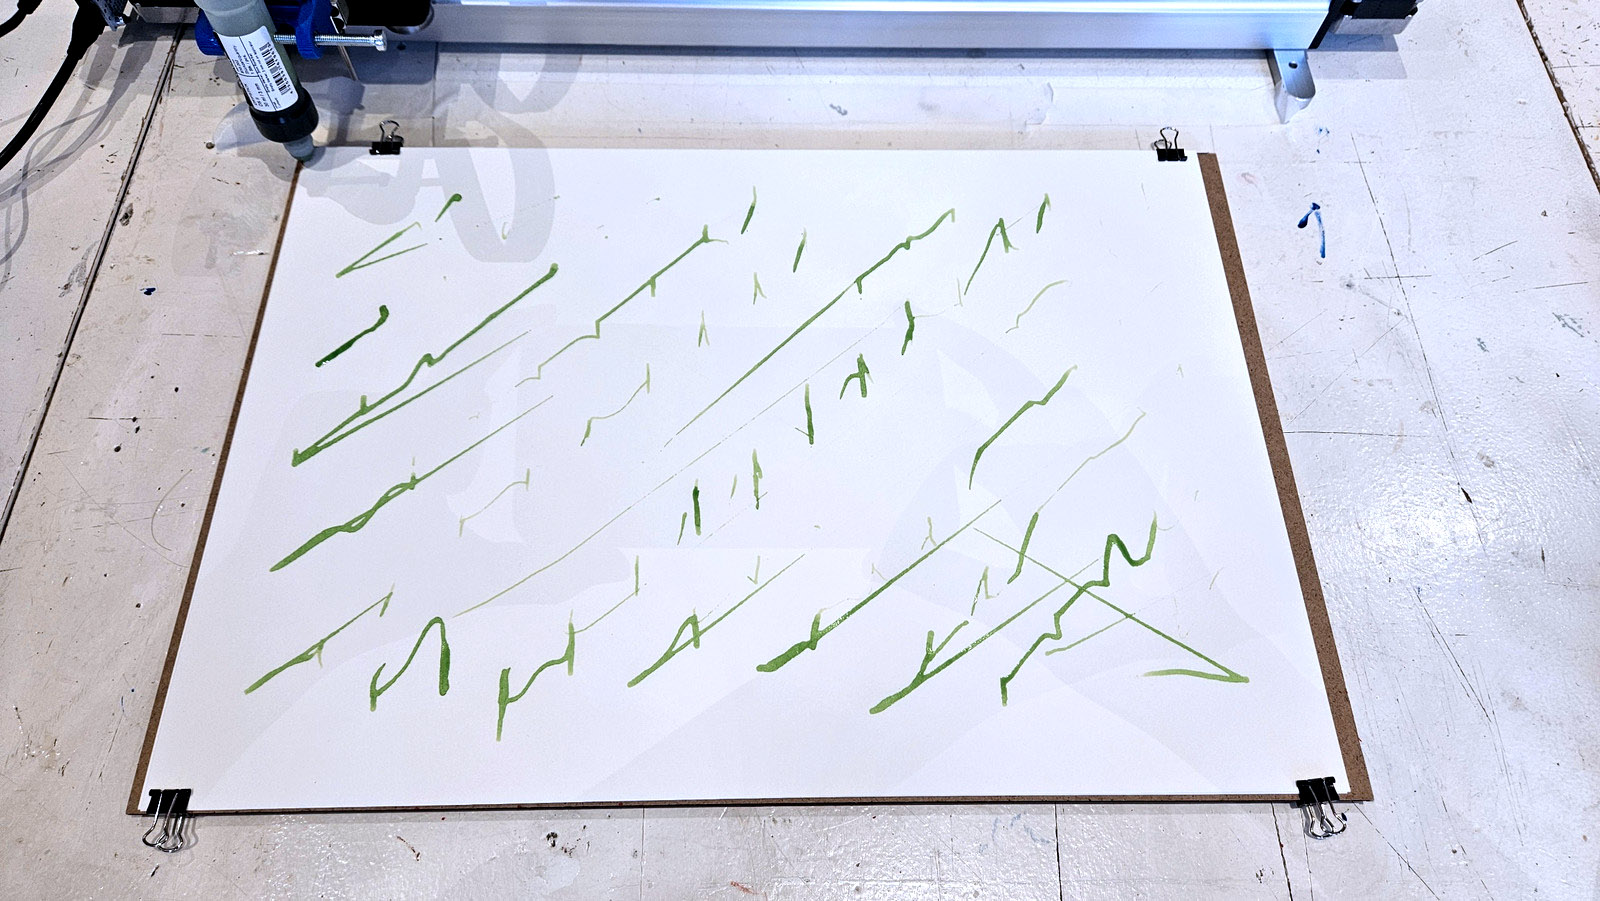
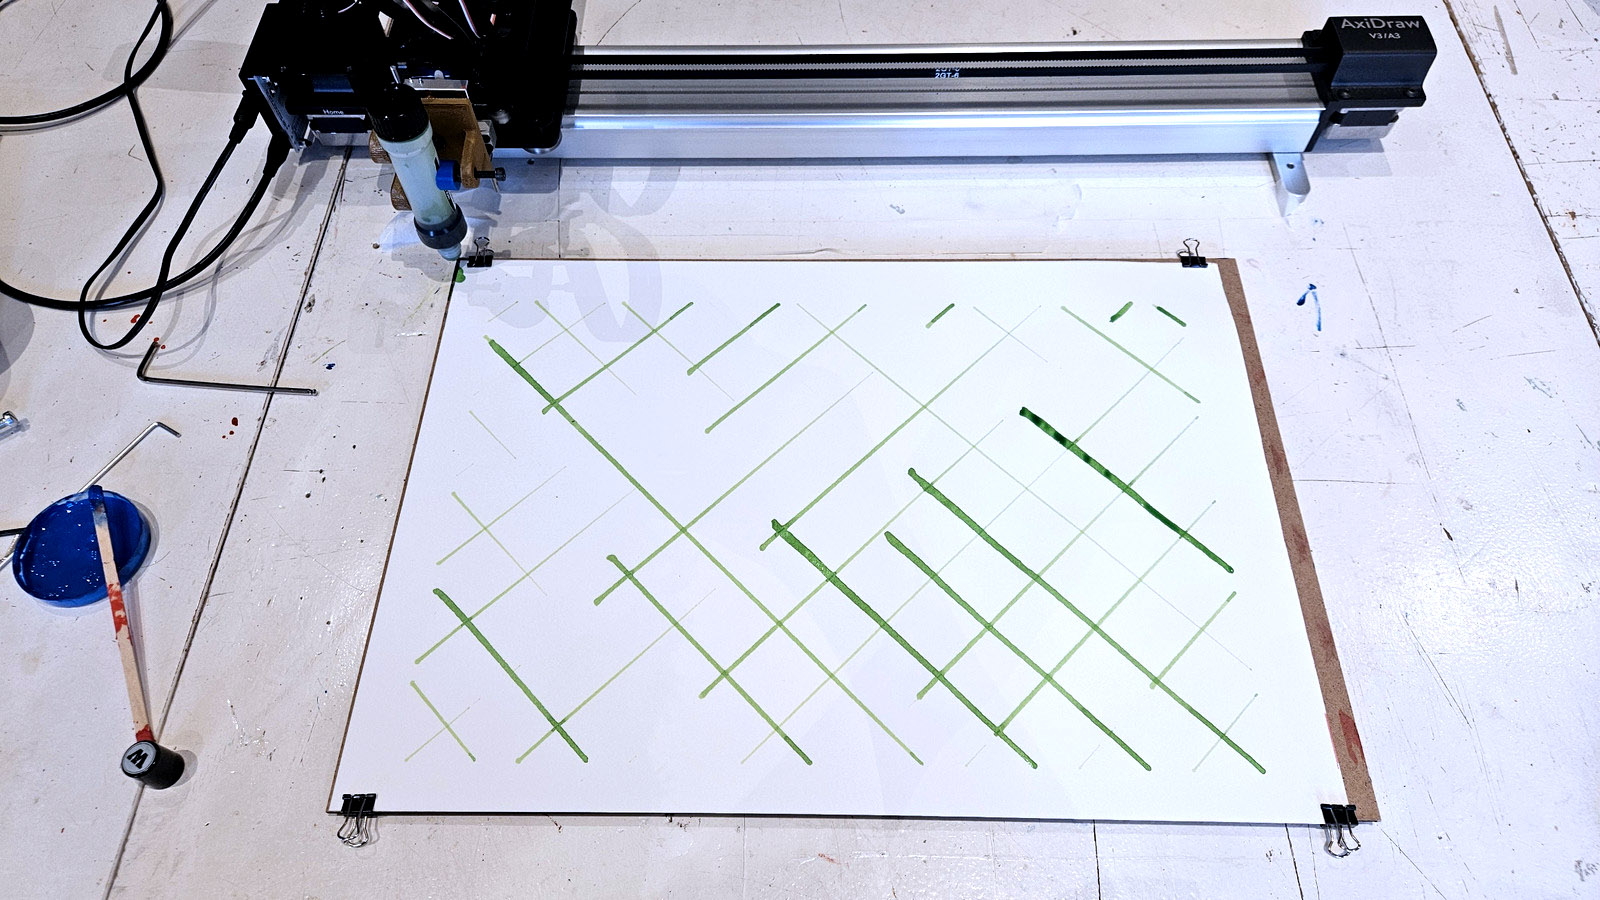
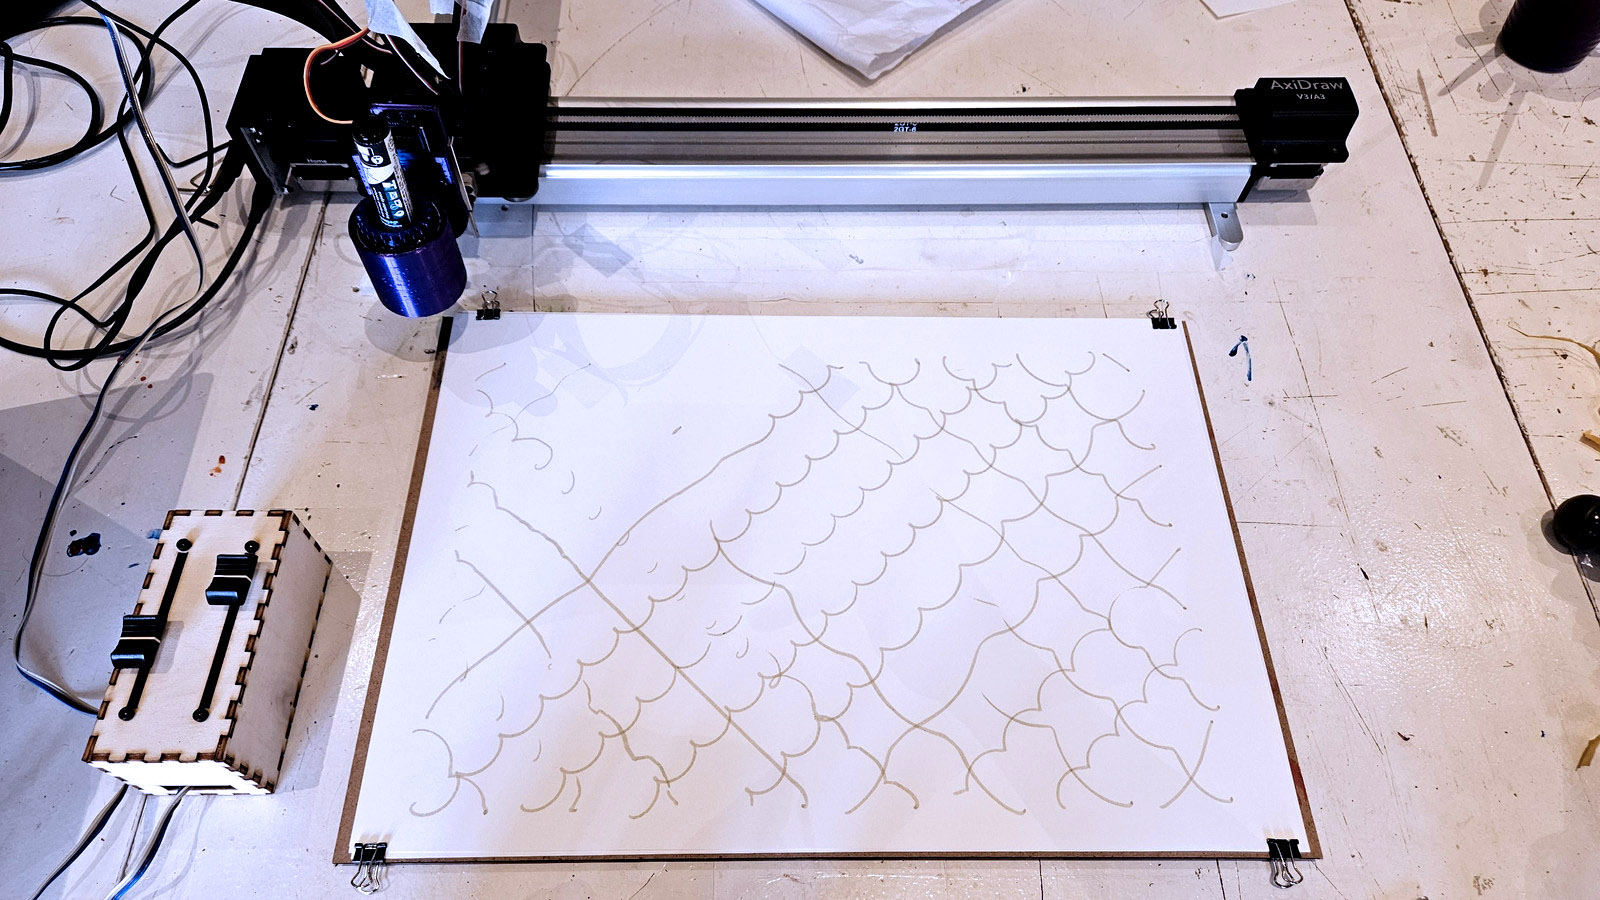
This file uses a different approach: instead of an up-and-down approach used in dotwork and blockprinting, we are using a dragging approach more common in plotting.


Experiment 10
We’re starting out with a fan brush used in watercolor, used with acrylic paint (bad idea) and red ecoline. The brush doesn’t look happy.
Experiment 11
Next we’re trying the Molotow Dripstick Rollerball again, which again needs manual help. This time tapping on the brush instead of pushing which creates a bit of a delay in the ink deposited. Not all of the lines are fully formed, making it look less regular.
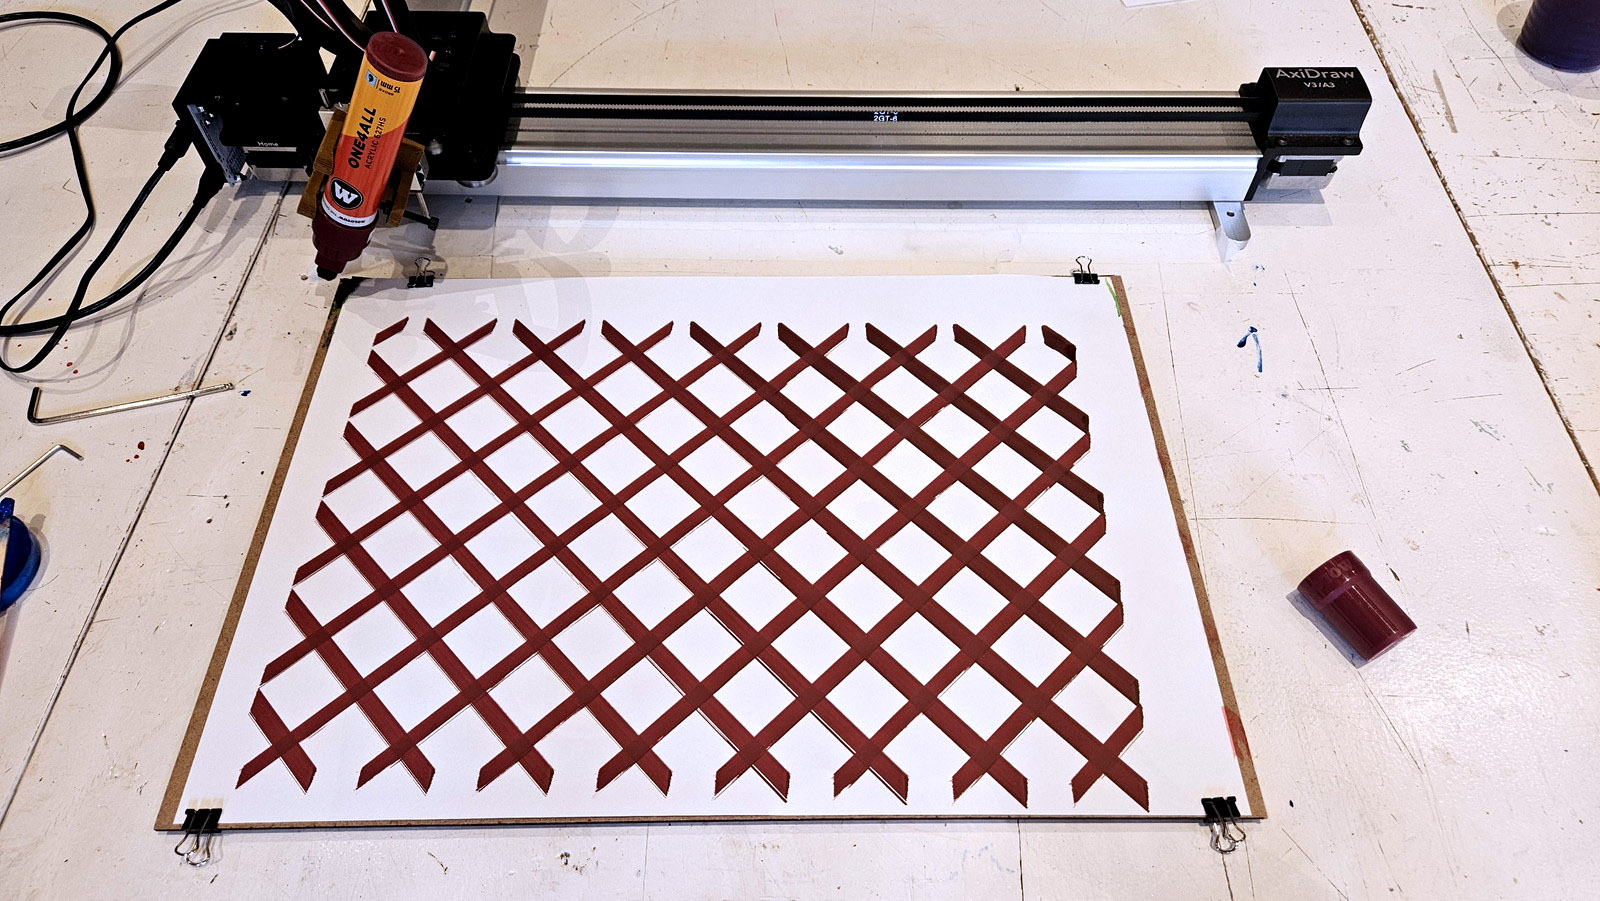
Experiment 12
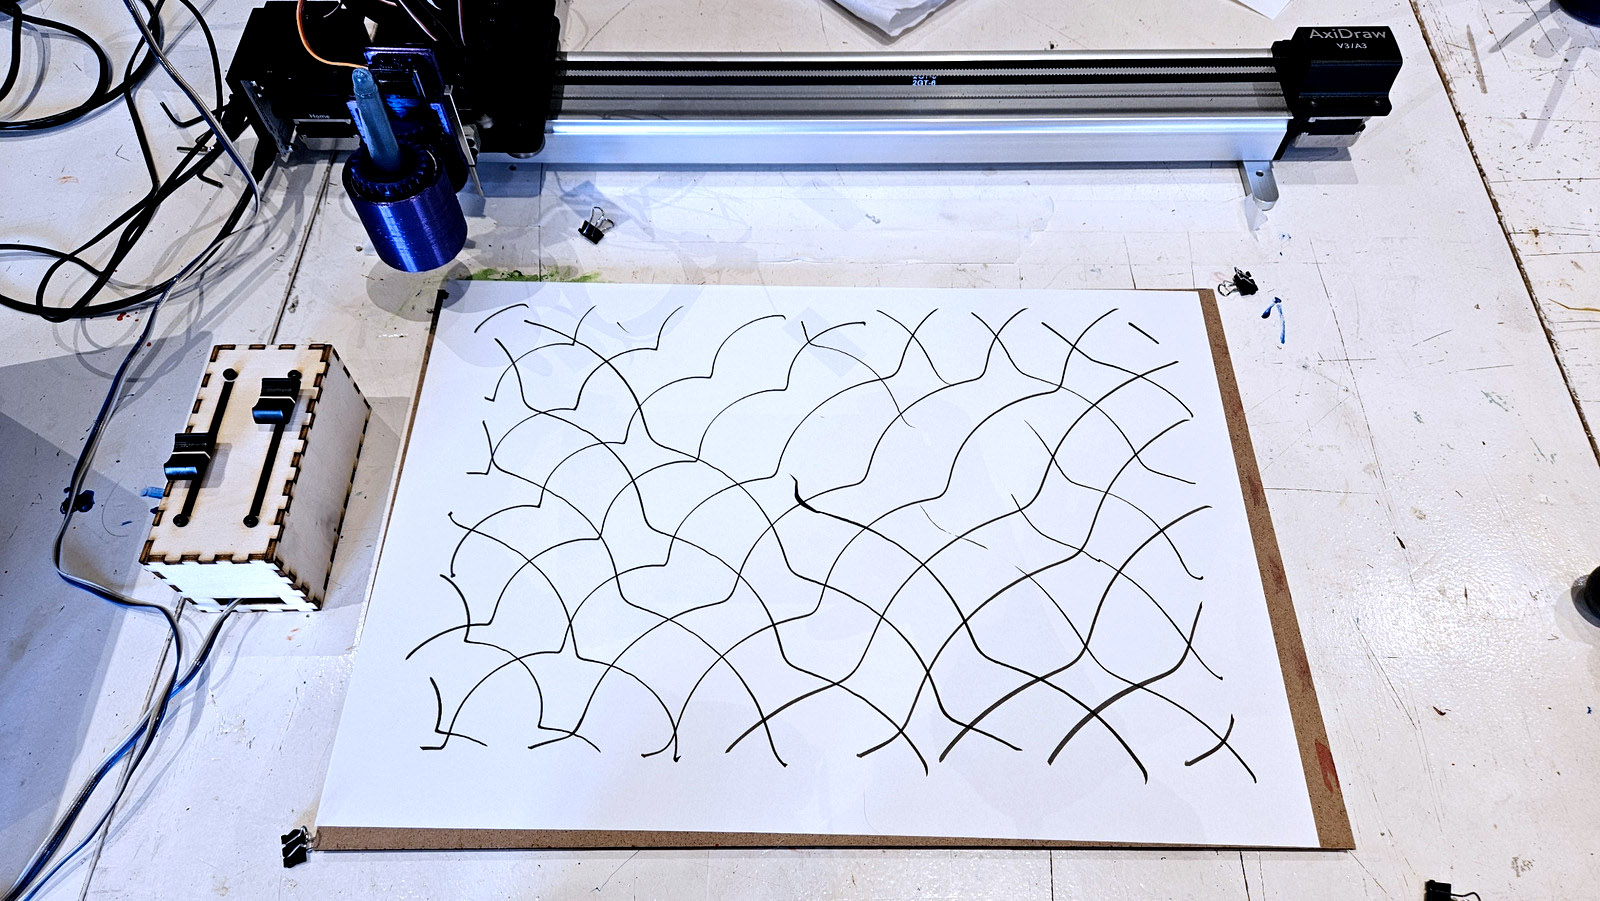
Here we used a Molotow acrylic paint marker, which is very saturated.
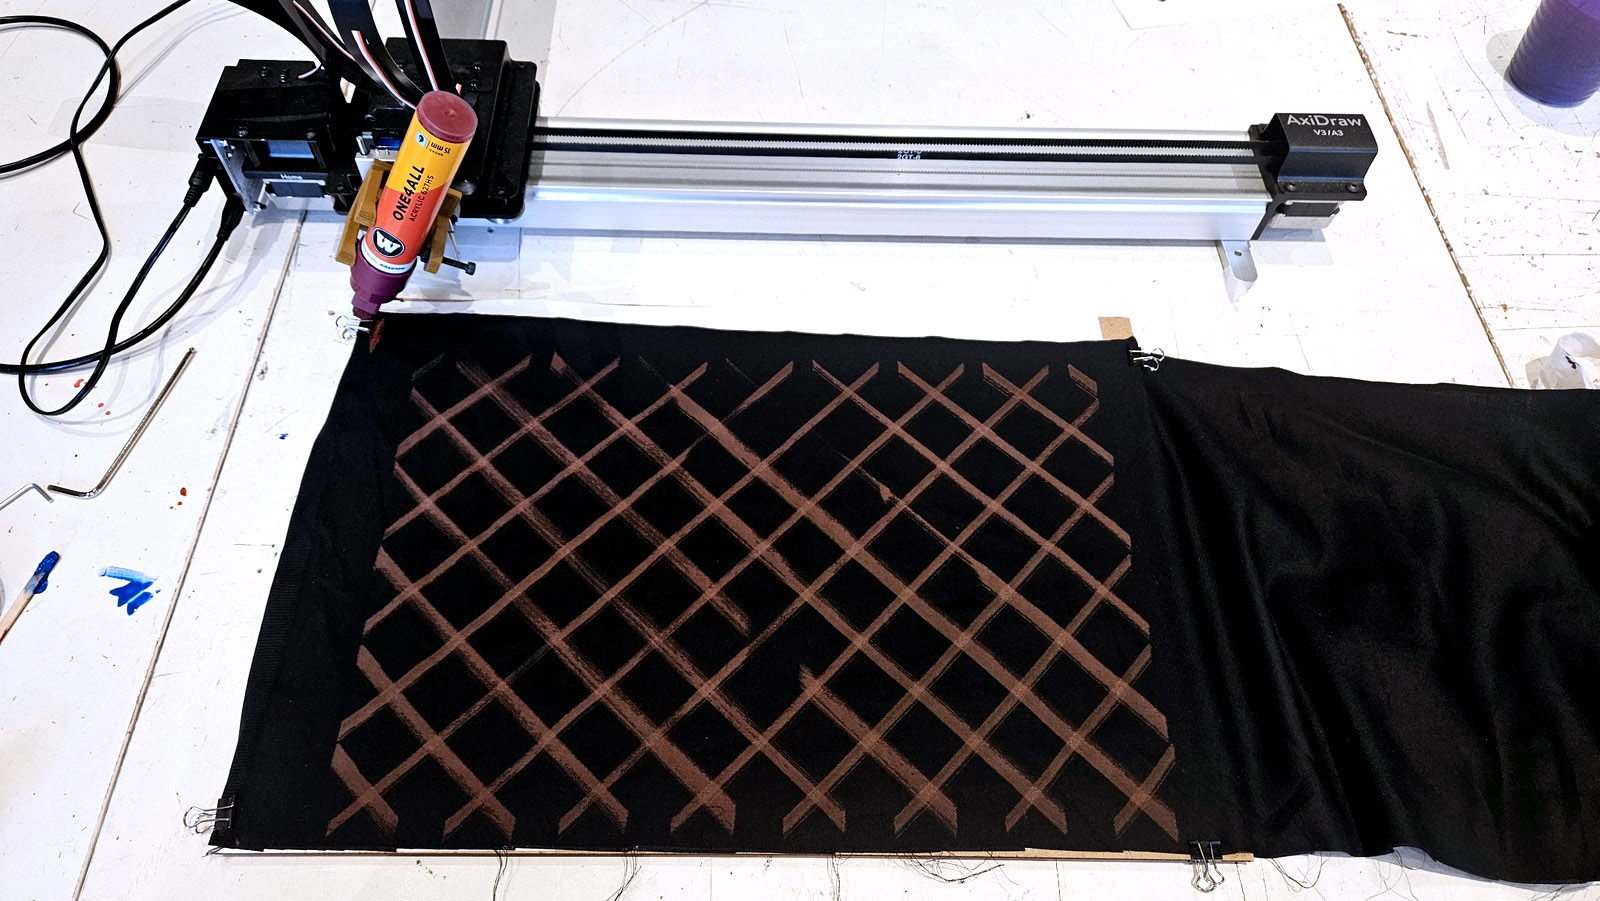
Experiment 13
Using the same marker, his is the first trial on fabric (black cotton satin with a shine, referring to the shiny black fabric used in Staphorst). We put a piece of paper in between the fabric and the board to protect it from staining. Here the friction of the material comes into play: Michelle needs to put her finger on the pen for some counter pressure. When we are moving to fabric permanently this is something we need to consider.
The fabric hasn’t been tensioned evenly, which can be done with more clamps or with a sticky surface.
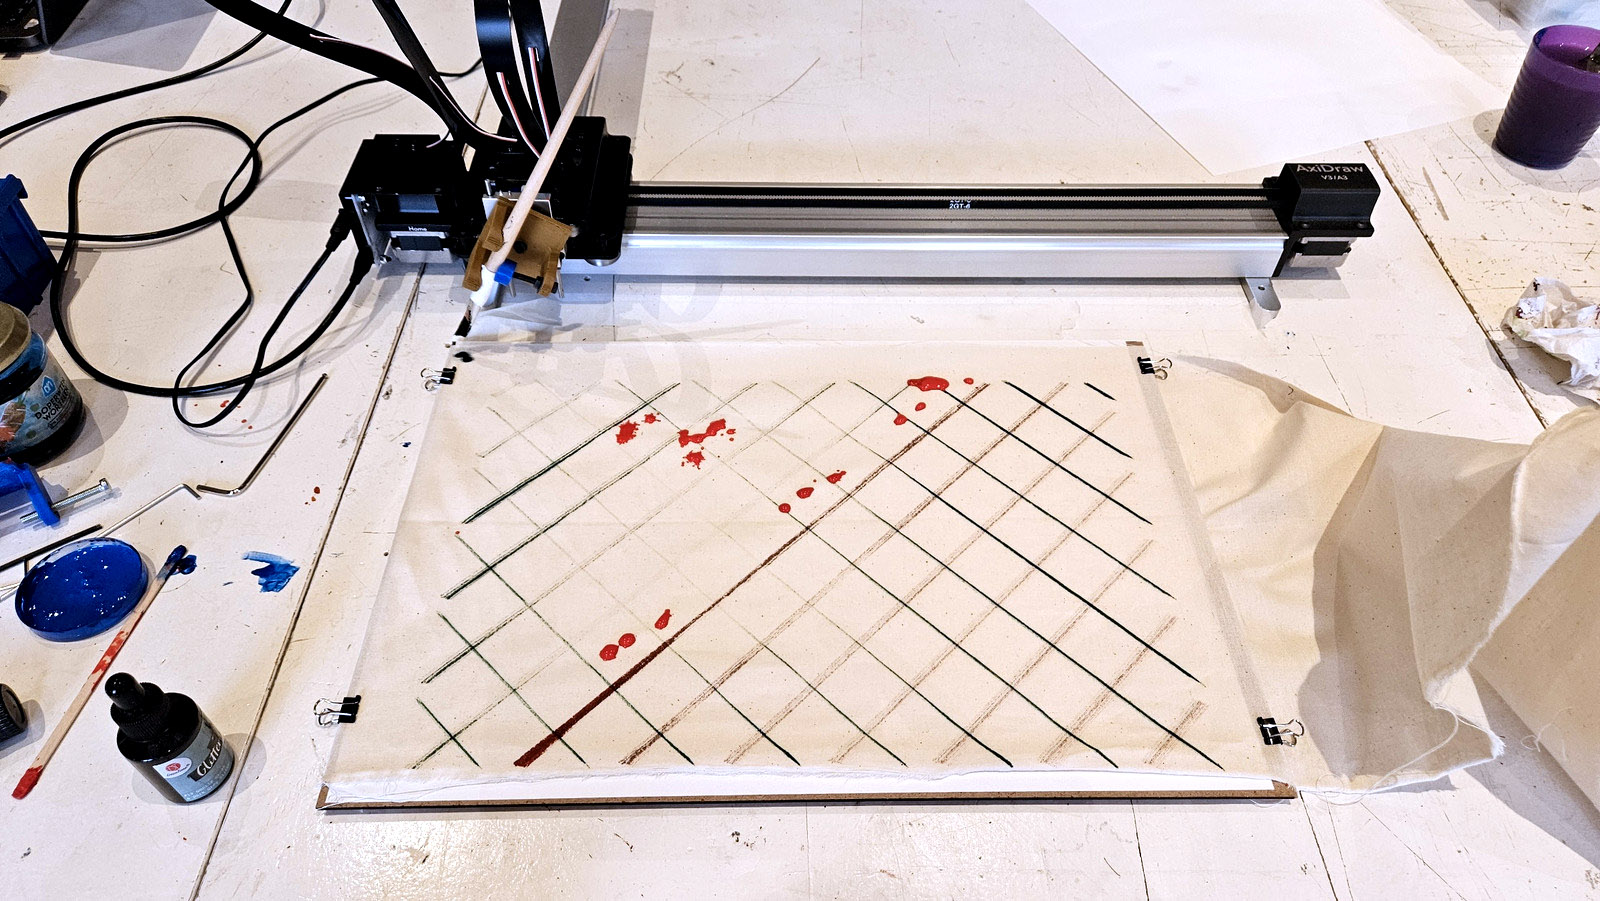
Experiment 14
Now using off-white cotton fabric and a brush, we played a bit with dripping ink on the brush and canvas.
Experiment 15
We moved on to the next tool holder, the revolving one. Now, the brush motion is becoming interesting, because we can influence the speed and direction of the revolution as a predecessor of the haptic tool we are going to develop. The brush stroke is a composite motion of the tool holder revolution and the machine movement. The marker used doesn’t have a lot of depth in its stroke.
Since this revolving tool holder prototype doesn’t have a proper way to center and secure tools yet, we’re using foam tape to position them. Trying to center tools is impossible that way, but if the pen tip is round, revolving it only makes sense if it’s rotating around an axis that is not its center as you can see here (can we call it serendipity?).
Experiment 16
Switching to a brush with interal reservoir again, the brush stroke is more dynamic and complete. The pattern shifted from a homogenous print to something that looks more like a composition.
Experiment 17
The same brush tip got squished too much and the rotation speed is too high, resulting in an unbalanced print.
Experiment 18
Here Asli is playing with the brush stroke, trying to create only very suble changes in rotation speed as a reaction to the previous experiment. You can see the tension and control in her finger as she operates the slide potentiometer.
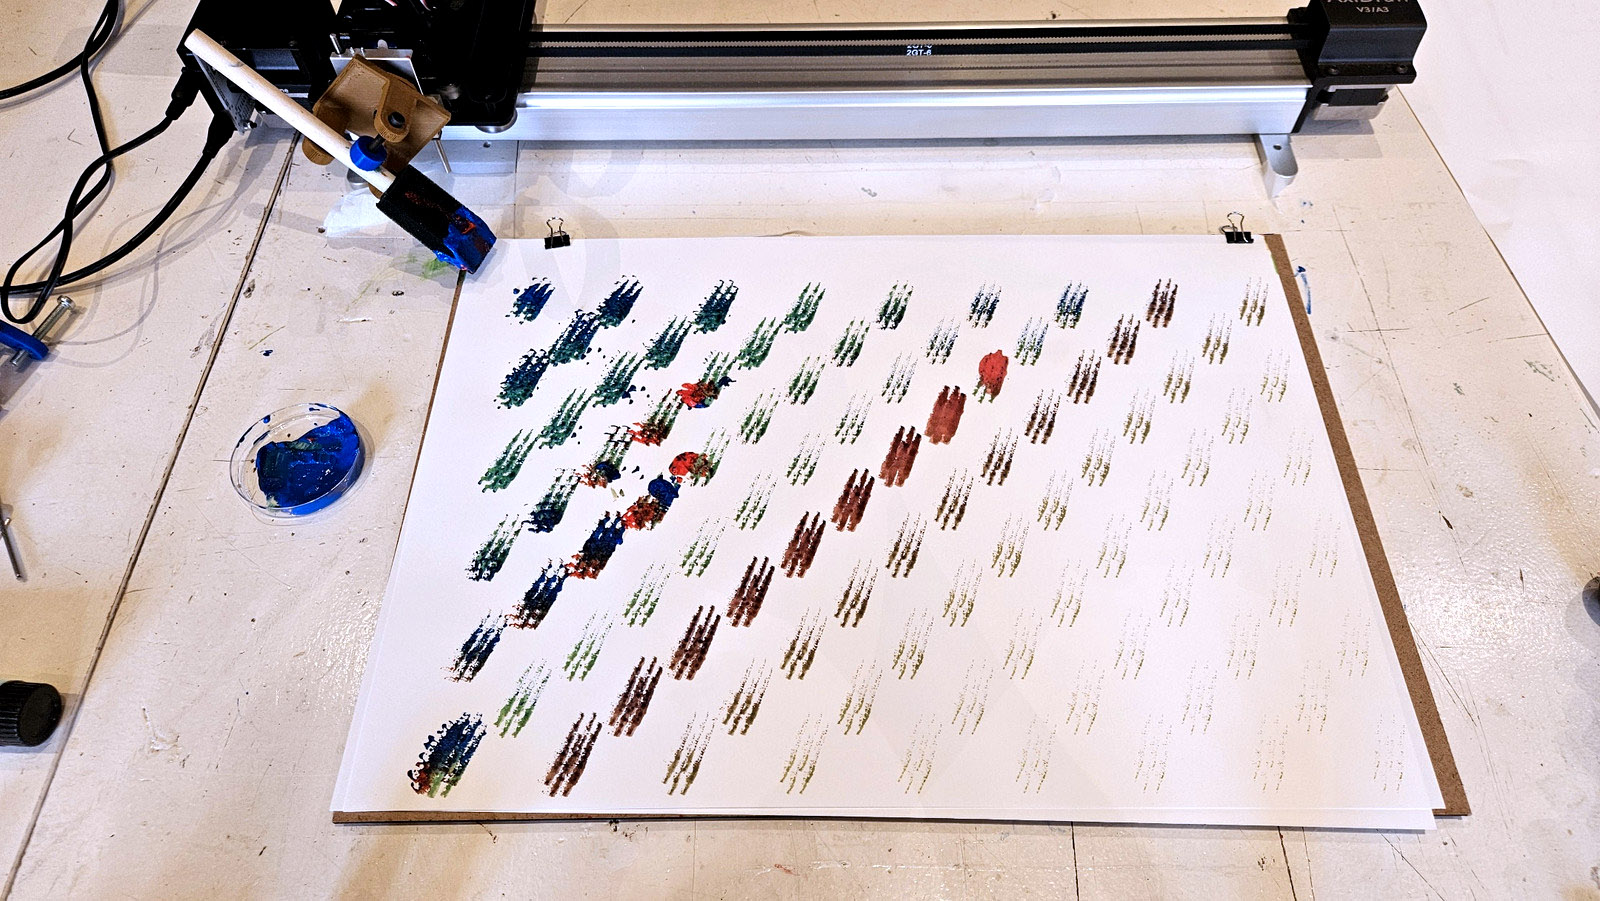
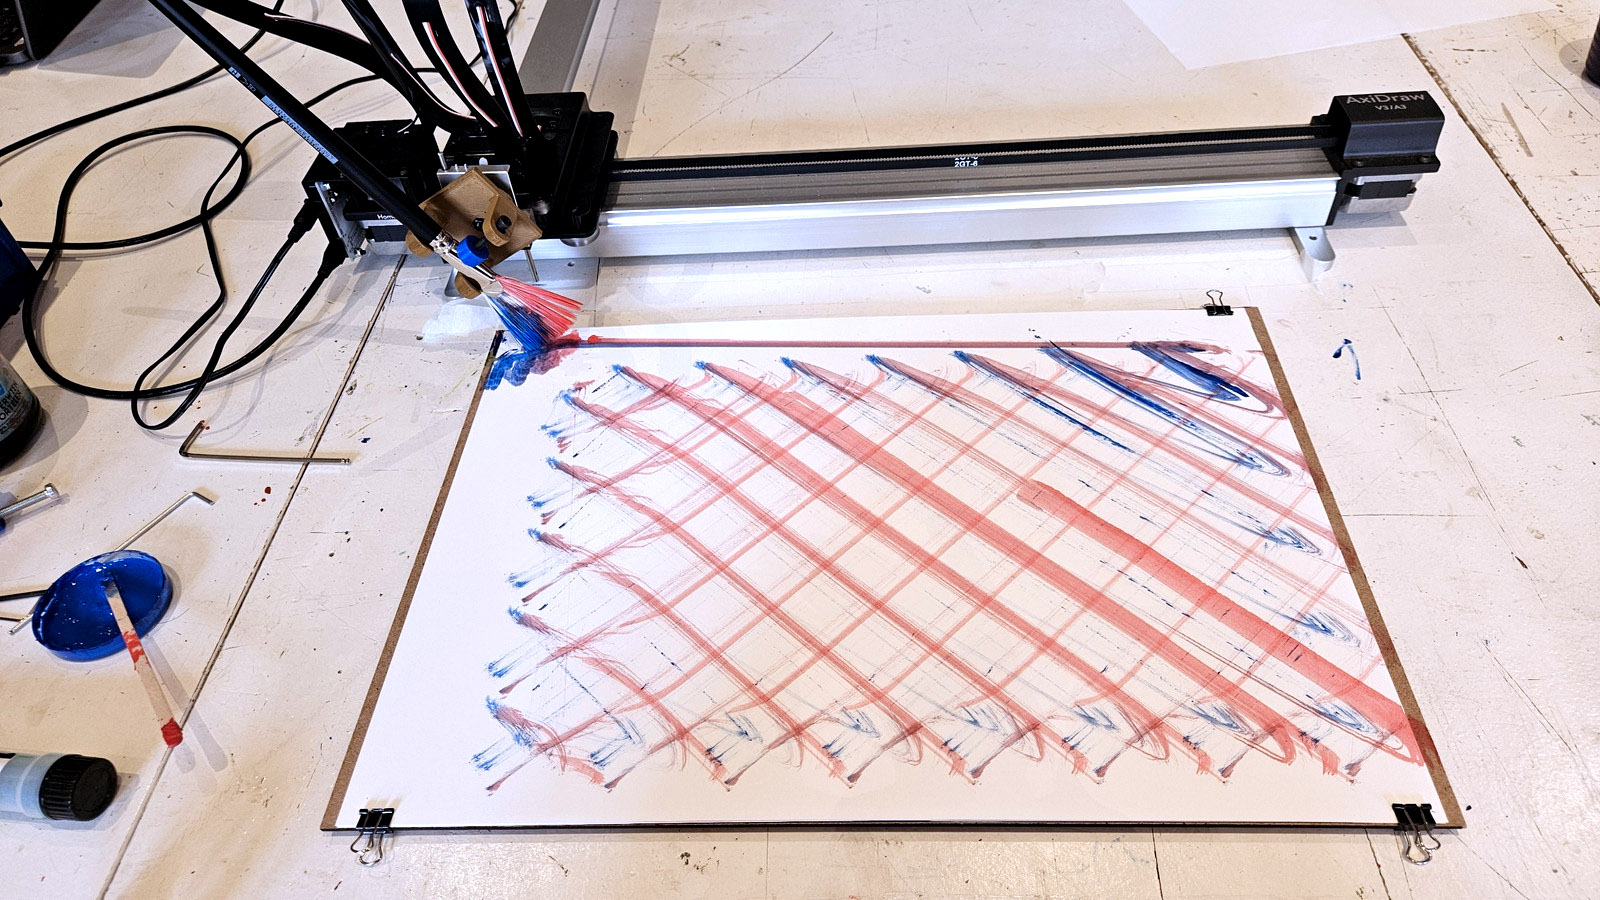
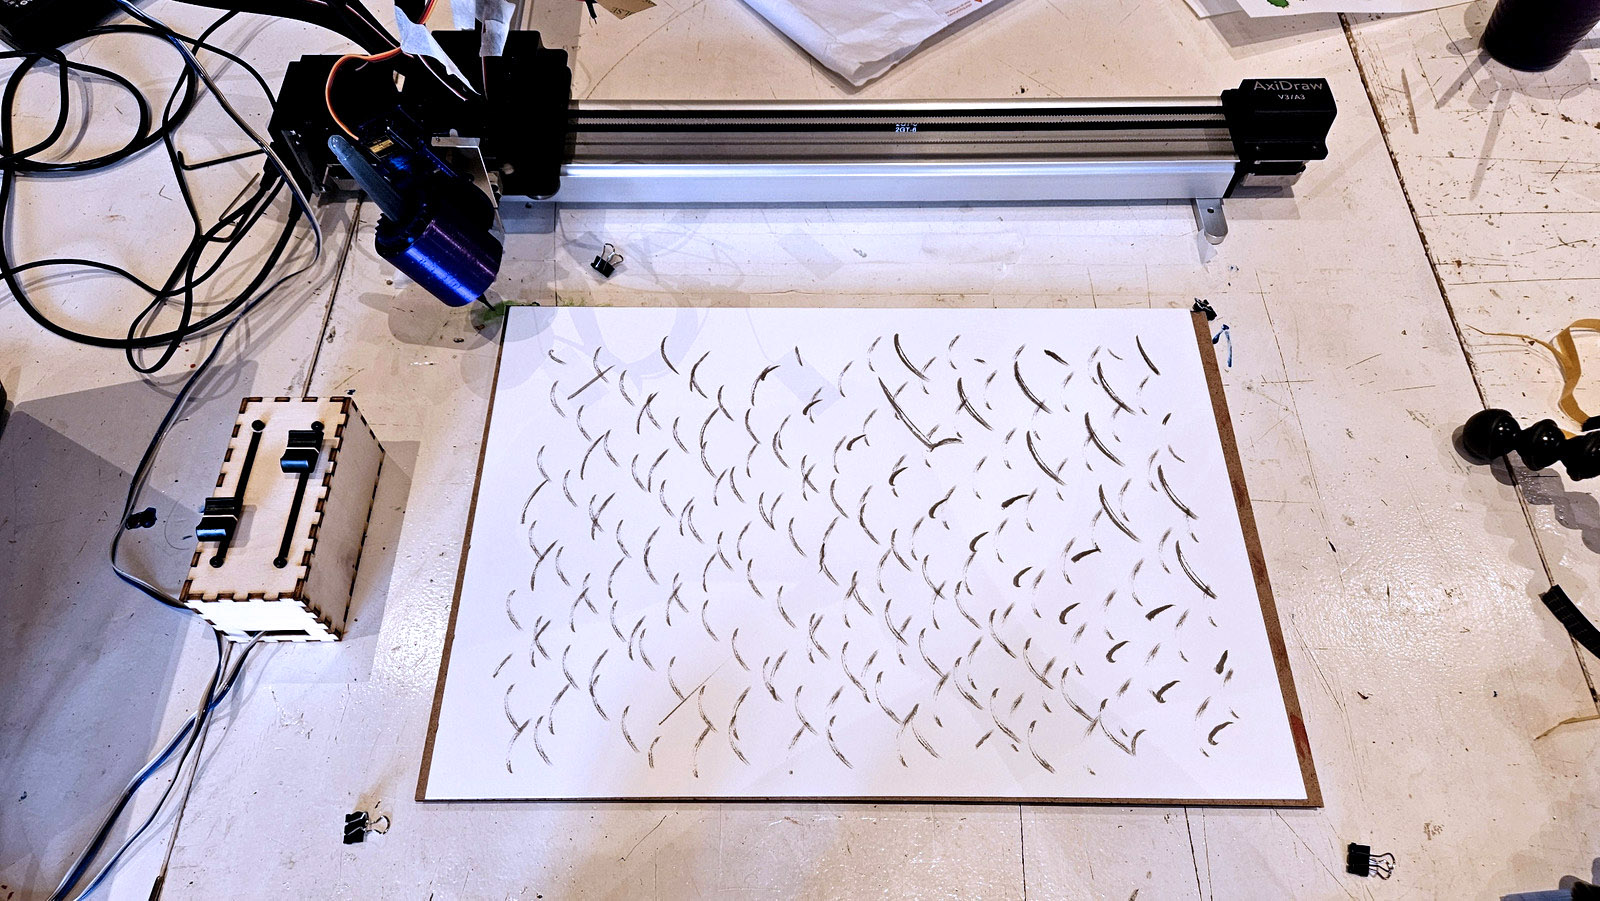
Experiment 20
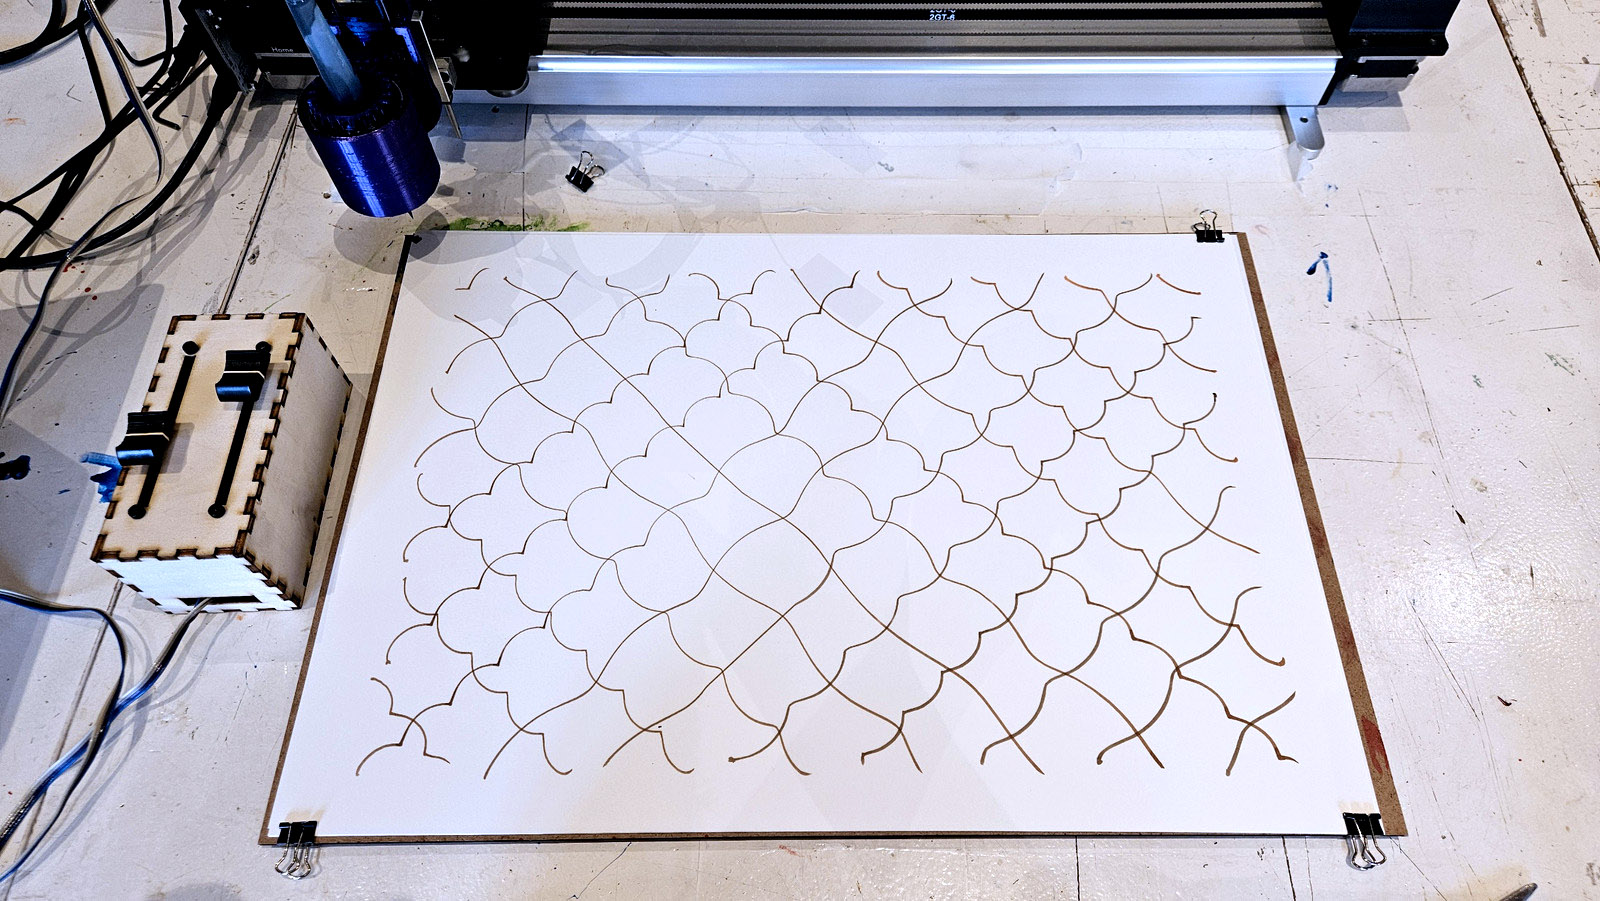
By rotating the revolving tool holder, the continuous dragging lines are broken. We did not vary the revolving speed here and you can see that the two different line directions create distinctly different brush strokes. Since the revolution speed and machine speed are not aligned, all brush strokes are slightly different. You can also see in the video that the brush is not centered in the tool holder and is rotating around the center axis of the
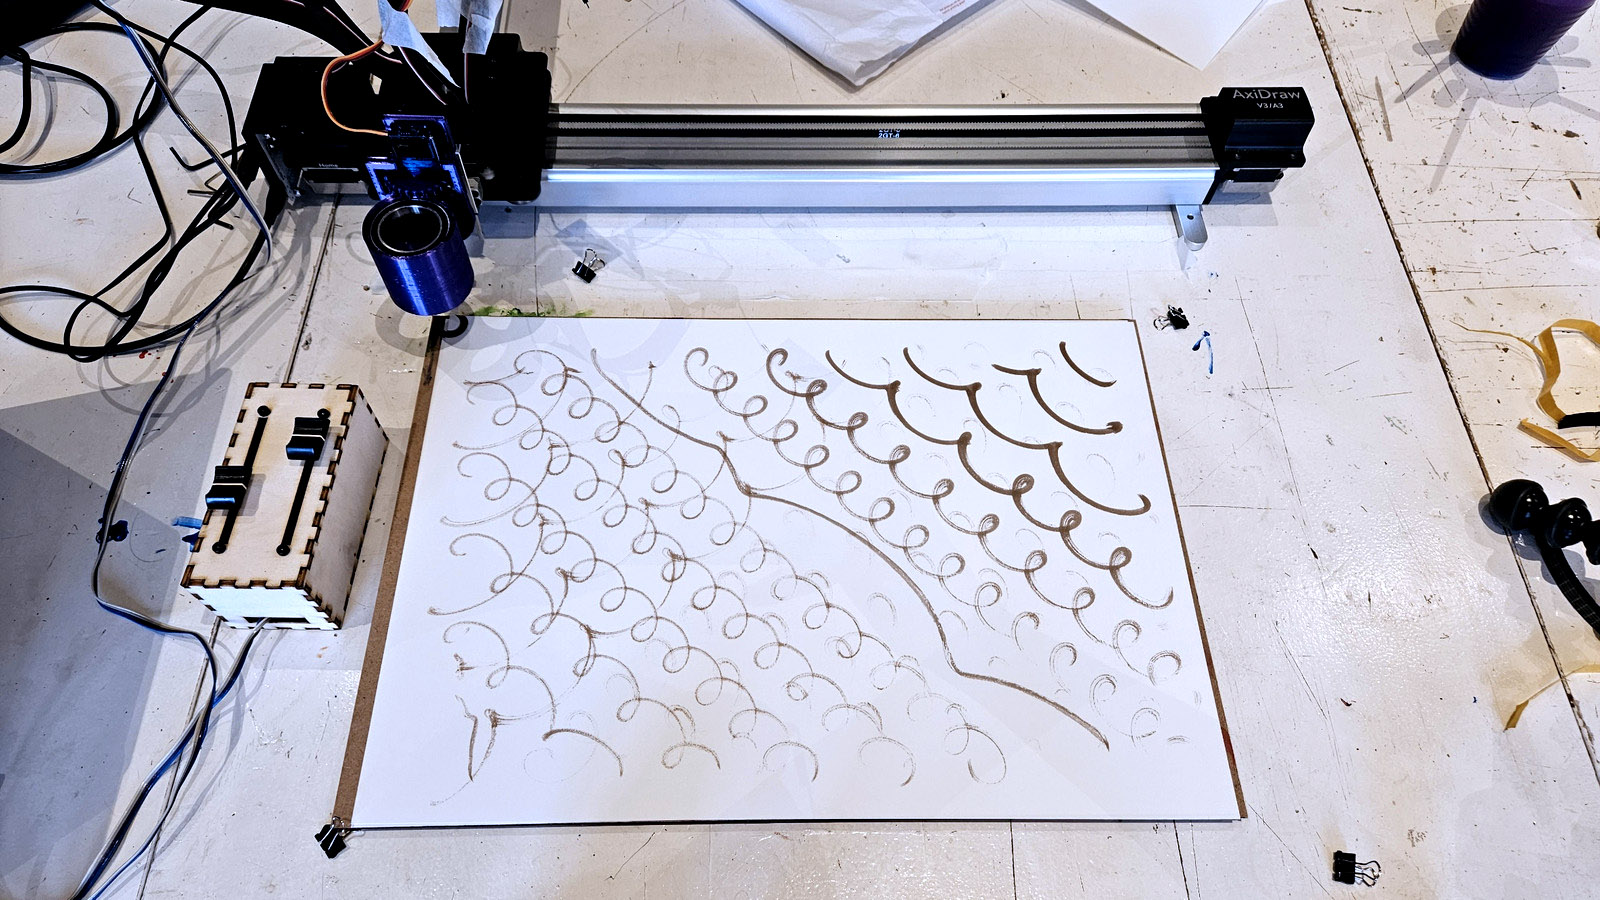
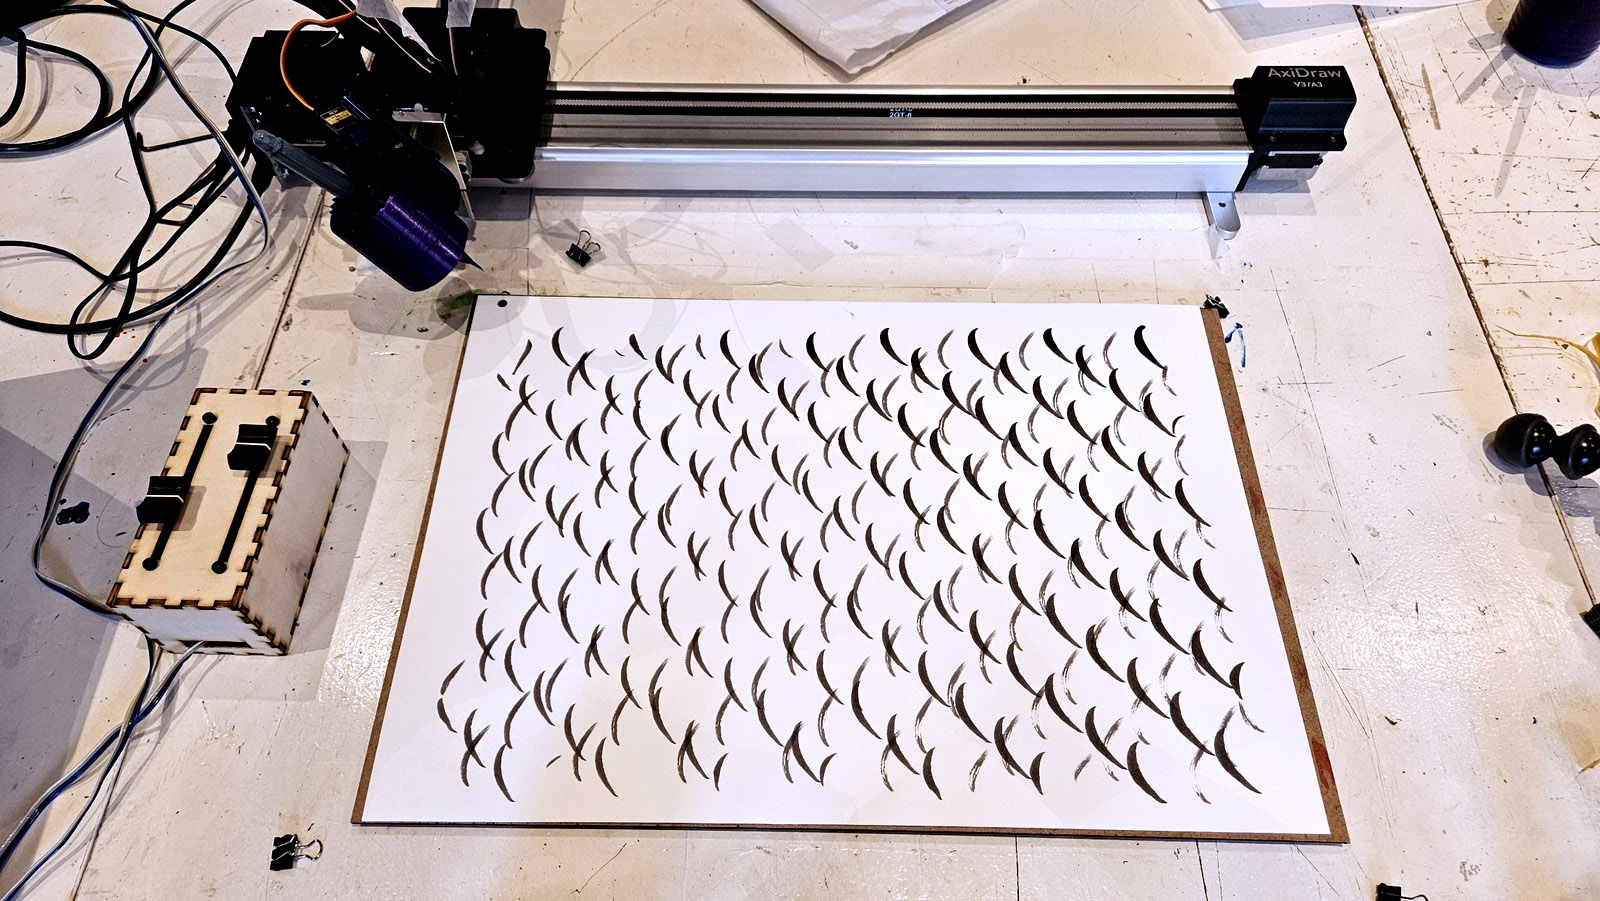
Experiment 21
Here you can immediately see the difference in speed of the tool holder.
Experiment 22
We changed the speed after the lines changed directions to create the same brush stroke in both directions.
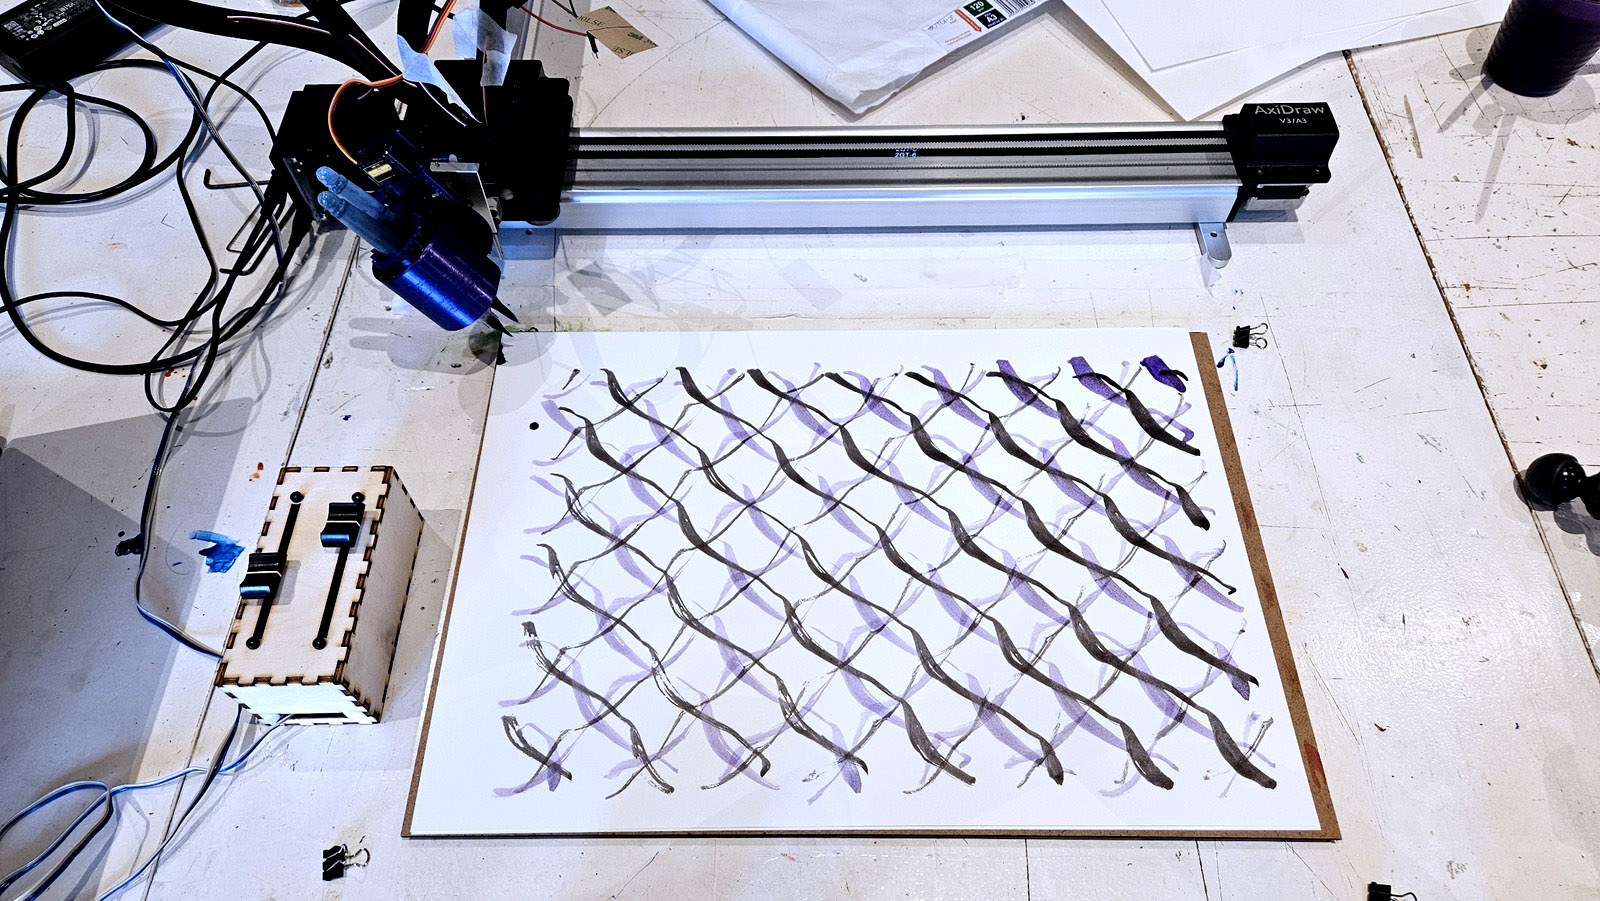
Experiment 23
We now squished two brush pens together in the revolving tool holder. This was were we got really excited: the brushes are dancing together!
Experiment 24
Here we used the same parameters but increased the speed on the tool holder; the pens were not secured well the revolving part lost contact with the gear for a bit, since there is only one bearing in the prototype.